Contents: Removal and inspection ⇓ Installation ⇓
Removal and inspection
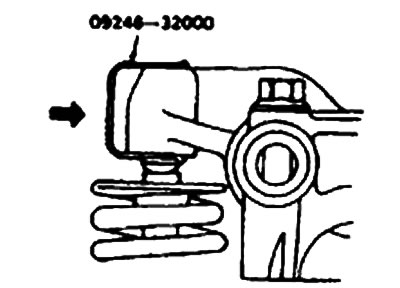
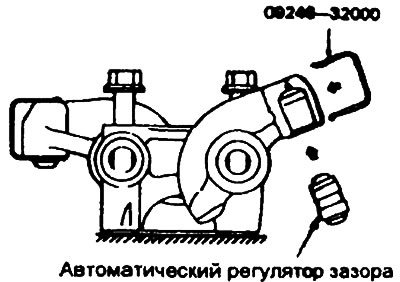
1. Before removing the rocker arm assembly and its shafts, using a special tool (09246- 32000), make sure that the automatic clearance adjuster has not fallen out.
Warning: Arrange the rocker arms and automatic lash adjusters in cylinder number order, with intake and exhaust rocker arms clearly separated to prevent confusion.
Automatic gap adjuster
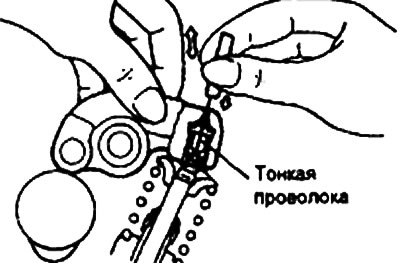
2. Check the ease of movement of the automatic lash adjuster by inserting a thin wire through the air outlet hole in the rocker arm and lightly pressing on the lash adjuster ball.
Rocker arms
3. Check the rocker arms for wear and damage. Replace them if necessary.
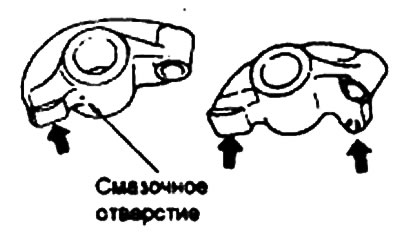
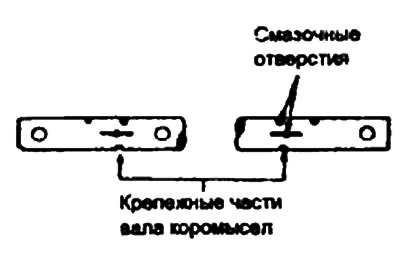
4. Check the cleanliness of the lubrication holes.
Rocker shaft
5. Check the rocker shaft mounting part for wear and damage. Replace if necessary.
6. Check the cleanliness of the lubrication holes.
Installation
Automatic clearance adjuster
1. Immerse the automatic lash adjuster in clean diesel fuel.
[Original version of the article on the website HYUNDAIBOOK.RU]
2. Using a thin wire, press the ball down slightly, then move the plunger up and down 4 or 5 times to release the air.
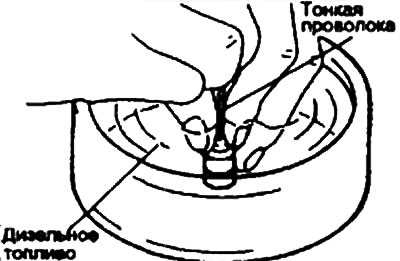
3. Insert the automatic clearance adjuster from below as shown in the figure, being careful not to spill any diesel fuel inside.
Rocker arms
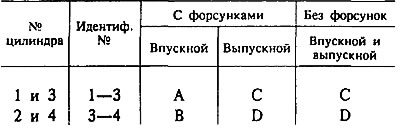
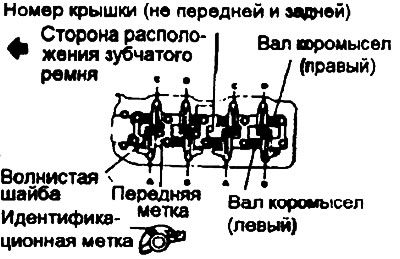
Check the identification tags and install them correctly.
Rocker shaft
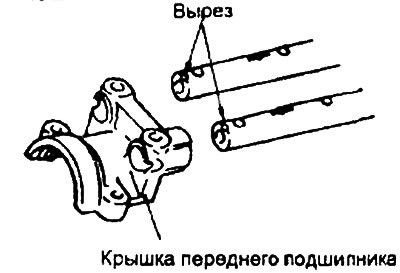
Insert the rocker shaft into the front bearing cover so that the cutout on its end faces upward, and insert the mounting bolt without tightening it.
Bearing cap
Covers 2, 3 and 4 have the same shape, so when installing them, it is necessary to check their numbers (applied to them).
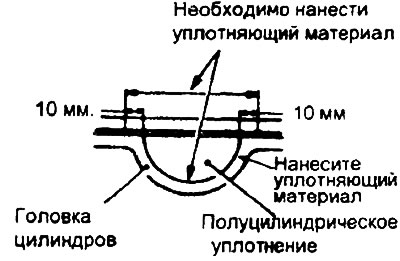
Valve cover
When installing the valve cover, apply sealing material to the semi-cylinder seal and the top surface of the cylinder head.
- Sealing Material: Valve Cover - Tri Bond No.10 or equivalent
Warning: Make sure the valve cover bolts are tightened to the specified torque. Overtightening the bolts may cause the cover to warp or oil leak.
- Tightening torque: Valve cover bolts - 5-7 Nm.