
Contents: Removal ⇓ Installation ⇓
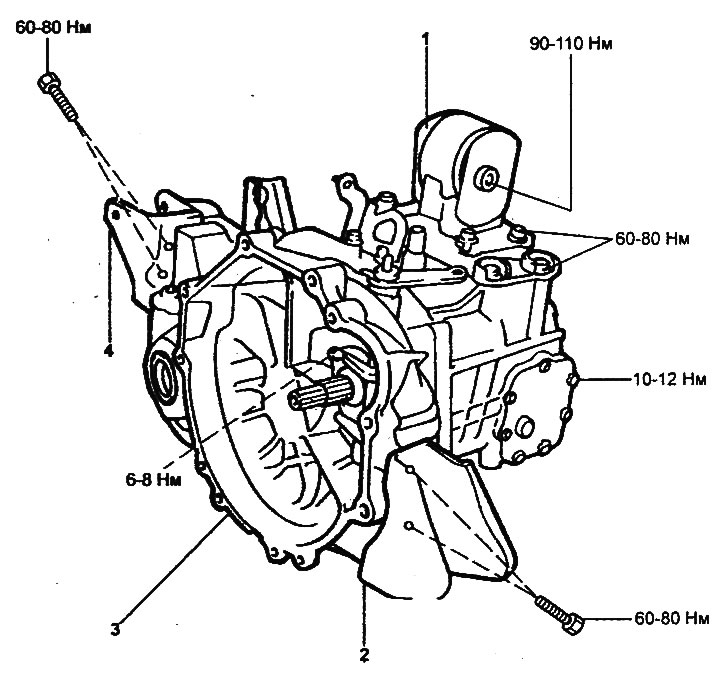
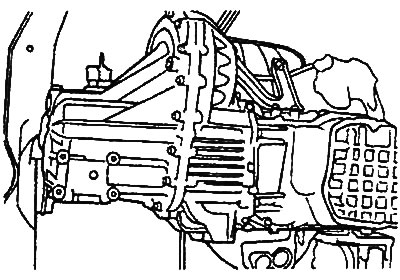
Removal and installation of a manual gearbox.
1 - gearbox bracket, 2 - front support of the power unit, 3 - gearbox assembly, 4 - rear support of the power unit.
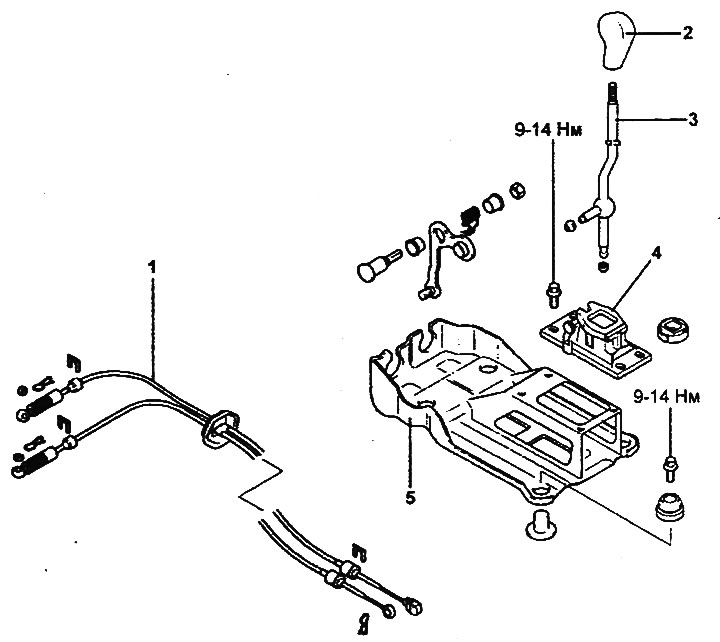
Gear selection and shifting mechanism.
1 - gearbox control cables, 2 - gear shift lever handle, 3 - gear shift lever, 4 - housing, 5 - bracket.
Removal
1. Disconnect the cable from the negative battery terminal.
2. Remove the air filter duct.
3. Remove the air cleaner assembly and engine air intake duct.
4. Disconnect the reversing light switch connector.
5. Remove the clutch hydraulic drive slave cylinder (see chapter "Clutch").
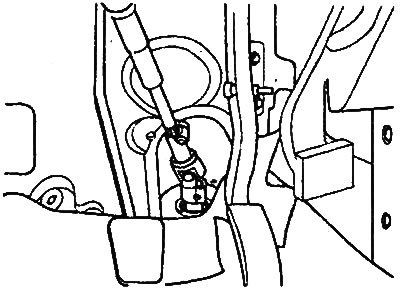
6. Disconnect the speedometer drive cable.
7. Remove the gear shift cable and gear selector cable (see section "Gearbox control cables").

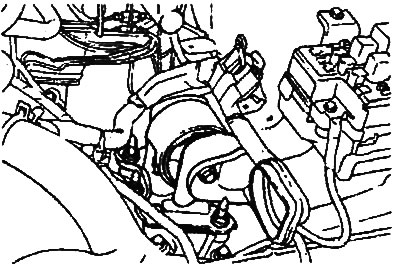
8. Remove the starter mounting bolts and the upper gearbox mounting bolts.
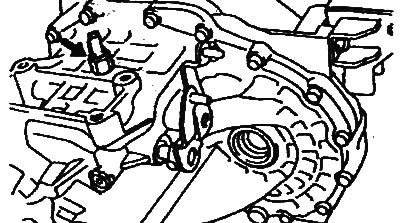
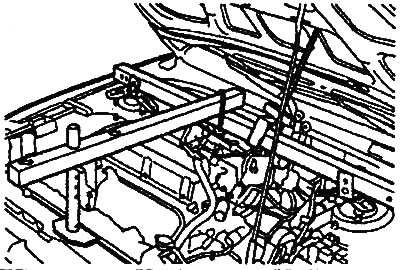
9. Using a special tool, lift the engine as shown in the figure.
10. Remove the gearbox bracket assembly.
11. Raise the car on a lift.
12. Loosen the bolts and remove the front wheels.
- Tightening torque: 90-110 Nm
13. Drain the oil from the gearbox housing (see chapter "Maintenance and general check and adjustment procedures").
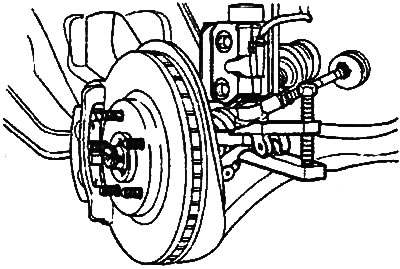
14. Disconnect the tie rod ends, lower ball joints and drive shafts (see chapter "Drive shafts").
15. Disconnect the intermediate steering shaft, unscrew the bolt securing the return pipe of the working fluid of the power steering pump (see chapter "Steering").
16. Disconnect the exhaust system components (see chapter "Exhaust system").
17. Loosen the subframe mounting bolts and remove the subframe.
18. Loosen the bolts and remove the front and rear powertrain mounts.
- Tightening torque: 60-80 Nm
19. Unscrew the side gearbox mounting bolts.
20. Lower the gearbox assembly from the engine compartment, supporting it with a hydraulic jack.
Note: When supporting the transmission, make sure that the crankcase contact with the jack is superficial and not point-like.
Installation
1. The gearbox is installed in the reverse order of removal. The tightening torques for the bolts and nuts are indicated in the text describing the removal procedure and in the assembly drawing "Removal and installation of a manual gearbox".
2. Installation of brackets and supports is carried out in the following order:
- engine bracket,
- gearbox bracket,
- rear powertrain support,
- front powertrain support.
3. When assembling the gearbox, use the lubricants and sealants listed below.
Lubricants:
- for primary shaft splines: CASMOLY L9508
- for oil seal lip: RETINAX AM, MOLYTEX GREASE EP-2
Sealants:
- for mating surfaces of gearbox, clutch housing and rear cover: THREE BOND 1216 gearbox
- bearing support bolts (with flange): THREE BOND 1303