Contents: Removal ⇓ Checking the clutch housing with…⇓ Checking the driven clutch disc ⇓ Checking the clutch release bearing ⇓ Checking the clutch release fork ⇓ Installation ⇓
Removal
1. Drain the oil from the gearbox and the brake fluid from the clutch hydraulic drive.
2. Remove the gearbox.
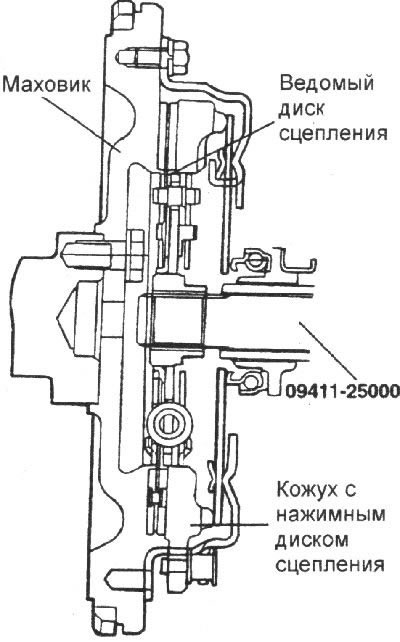
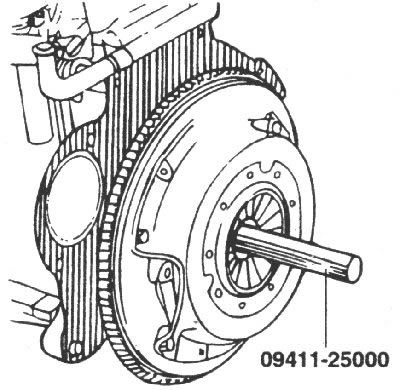
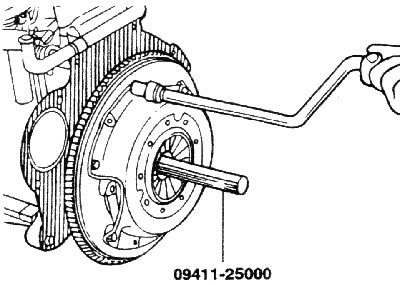
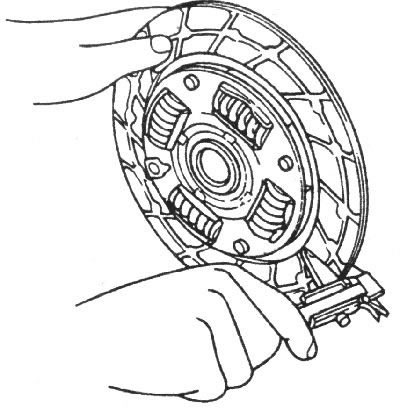
3. Install the 09411–25000 clutch disc centering tool, which in this case will prevent the driven clutch disc from falling.
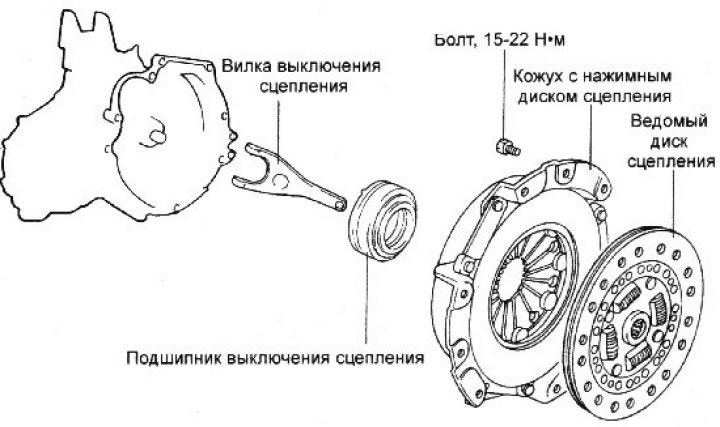
4. Gradually loosen the clutch assembly mounting bolts diagonally, turning each bolt S turns until the diaphragm spring action is released and the bolts can be unscrewed by hand. Remove the clutch cover with pressure plate and the clutch disc.
Caution: Do not clean the clutch disc or release bearing with solvent.
It is advisable to remove the flywheel and check the rear crankshaft sealing ring for leaks. Replace the sealing ring if necessary.
Checking the clutch housing with pressure plate
1. Check the diaphragm spring at the points of contact with the clutch release bearing for wear, cracks and determine the difference in the height of the ends of the diaphragm spring. If there are any defects, replace the clutch housing with the pressure plate.
2. Check the pressure plate for cracks, burns and surface wear.
3. Check the reliability of the riveted connections.
Checking the driven clutch disc
1. Check the reliability of the riveted connections of the friction linings to the clutch disc. If there are any defects, replace the clutch disc.
2. Check the thickness of the driven disk in a free state.
9. Check the driven disk springs for play and damage and, if necessary, replace the faulty disk.
10. Clean the splines of the gearbox input shaft and install the clutch disc on the shaft. If the clutch disc moves along the shaft with difficulty or there is too much play in the spline connection, replace the clutch disc and/or the input shaft.
Checking the clutch release bearing
Caution: The clutch release bearing is sealed and must not be washed.
1. Check the condition of the clutch release bearing, which should rotate easily, evenly and quietly and should have no play. The working surface of the bearing, which acts on the pressure spring, should be smooth, without cracks, local corrosion or wear.
2. A faulty clutch release bearing can be identified without removing it from the vehicle by pressing the clutch pedal while the engine is running. If additional noise occurs when the clutch pedal is pressed, the clutch release bearing is faulty and must be replaced.
Checking the clutch release fork
If there is uneven wear at the contact points of the release fork with the bearing, replace the release fork.
Installation
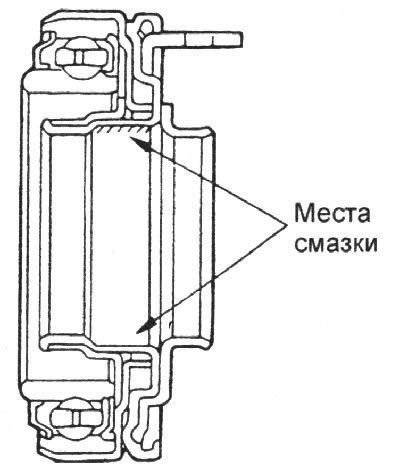
1. Apply general purpose grease to the contact surfaces of the clutch release bearing and slave cylinder.
Caution: When installing the clutch, apply grease to all moving parts, but do not use excessive amounts of grease as this may cause the clutch to slip.
2. Apply grease to the clutch release bearing recess. Grease: CASMOLY L9508.
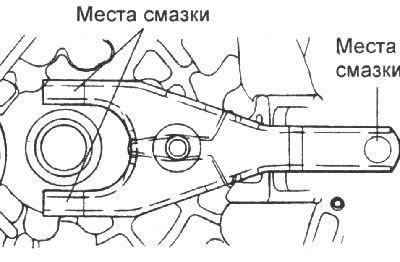
3. Apply multi-purpose grease to the clutch release fork where it contacts the clutch release lever shaft.
Lubricant: CASMOLY L9508.
4. Using fine grit sandpaper, clean the flywheel and pressure plate surfaces and ensure that all abrasive material and grease are removed from the cleaned surfaces.
5. Apply grease to the clutch disc splines and gearbox input shaft.
Lubricant: CASMOLY L9508.
Caution: Do not use excessive amounts of lubricant as this may cause the clutch to slip.
6. Install the clutch disc and center it with the special tool 09411–25000. When installing the clutch disc, the surface of the disc with the marking must be located on the pressure plate side.
7. Install the clutch housing with pressure plate onto the flywheel guide pins and screw in the six bolts.
8. Gradually tighten the flywheel mounting bolts in a diagonal sequence.
Tightening torque: 15–22 Nm.
9. Remove the mandrel that centers the clutch disc.
10. Install the gearbox.
11. Adjust the clutch pedal free play.