
Contents: Checking the technical condition ⇓ Disassembly ⇓ Checking the technical condition ⇓ Assembly ⇓ Installation ⇓
Loosen the working cylinder mounting bolt.
Checking the technical condition
Check the slave cylinder for fluid leaks.
Check the slave cylinder boot for damage.
Disassembly
Disconnect the connecting hose from the cylinder, remove the valve plate, spring, pusher and boot.
Carefully remove dirt from around the piston bore of the working cylinder.
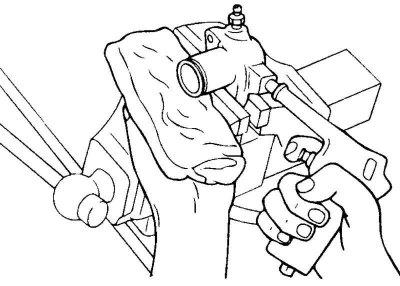
Fig. 3.26. Removing the piston from the cylinder
Remove the piston from the cylinder by supplying compressed air to it (Fig. 3.26).
Caution! Cover the working cylinder with a rag beforehand, as the piston may fly out with great force and cause injury.
Caution: Increase the air pressure gradually to prevent brake fluid from escaping and getting into your eyes or on your skin.
Checking the technical condition
Check the working cylinder mirror for corrosion or damage.
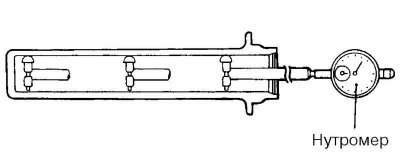
Fig. 3.27. Checking the inner diameter of the cylinder using a bore gauge
[The article is copied from this website: HYUNDAIBOOK.RU]
Using a bore gauge, check the inner diameter of the cylinder in three places (lower, middle and upper parts). If the clearance between the piston and the cylinder exceeds the maximum permissible value, replace the working cylinder (Fig. 3.27).
Maximum permissible clearance between the piston and the cylinder: 0.15 mm.
Assembly
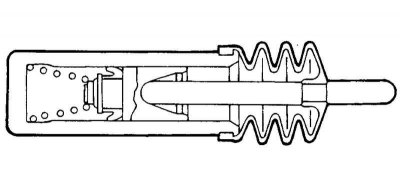
Fig. 3.28. Installing the piston into the cylinder
Apply DOT 3 or DOT 4 brake fluid to the inside surface of the slave cylinder and the outside surface of the piston and piston seal and install the piston into the cylinder (Fig. 3.28).
Install the valve plate, tappet and boot.
Installation
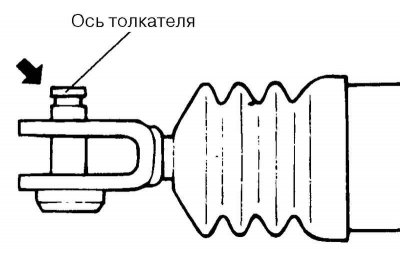
Fig. 3.29. Pusher axis
Apply the required grade of grease to the push rod axle (Fig. 3.29).
Install the clutch slave cylinder and tighten the slave cylinder mounting bolt.