
Contents: Checking fuel pressure ⇓ Replacing the fuel filter and fuel…⇓ Replacing the overflow limiter…⇓ Replacing the fuel level indicator…⇓
Turn off the ignition.
Check the operation of the fuel pump by applying battery voltage to the terminals of the electrical connector of the pump electric motor.
Note: The fuel pump is installed in the fuel tank, so the sound of its operation can only be heard when the filler cap is removed.
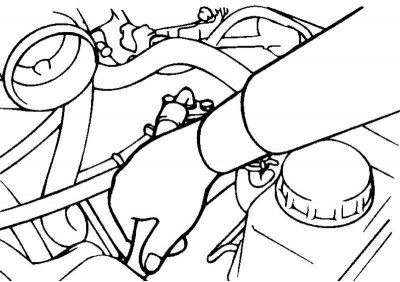
Fig. 2.210. Checking for pressure in the fuel supply hose
Make sure the fuel supply hose is under pressure by squeezing it with your hand (Fig. 2.210).
Checking fuel pressure
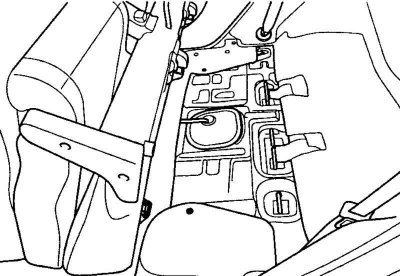
Fig. 2.211. Access hatch to the fuel pump from the vehicle interior (rear seat folded)
Fold the rear seat back, then fold the folded rear seat forward (Fig. 2.211).
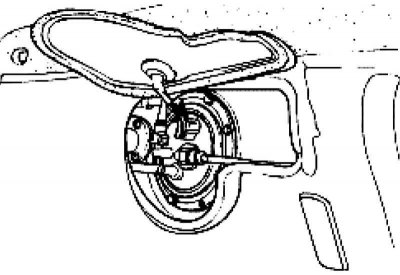
Fig. 2.212. Fuel pump access hatch (open)
Use a screwdriver to open the fuel pump hatch cover in the bottom of the car under the rear seat (Fig. 2.212).
To relieve pressure in the fuel lines and hoses, start the engine with the fuel pump disconnected and wait until the engine stops.
Note: Before disconnecting the fuel line and hose, it is necessary to relieve the fuel pressure to prevent fuel from being released.
Disconnect the terminal from the negative ("–") terminal of the battery and connect the electrical connector of the fuel pump.
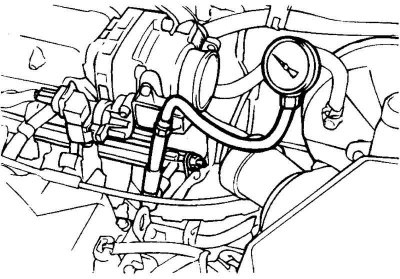
Fig. 2.213. Connecting a pressure gauge to measure fuel pressure in the system
Attach the test pressure gauge (Fig. 2.213) to the fuel filter using an adapter. Securely tighten the fuel pressure gauge adapter fitting.
Connect the terminal to the negative ("–") terminal of the battery.
Turn on the fuel pump by applying battery voltage to the terminals of the pump electrical connector.
After creating fuel pressure, check for fuel leaks through the test pressure gauge and its connections.
Start the engine and let it idle.
Check the fuel supply pressure.
Nominal value: 350 kPa (3.5 kgf/cm²).
If the fuel supply pressure is not within the normal range, determine the cause and correct the problem as follows.
Stop the engine and monitor the fuel pressure on the test gauge: the pressure should be maintained for about 5 minutes. If the pressure drops, determine the rate of drop. Determine and eliminate the cause of the pressure drop as indicated below.
Note: When disconnecting the hose, cover the fitting with a rag to prevent fuel from escaping, as the fuel line is under residual pressure.
Replace the hose fitting sealing ring.
Connect the fuel hose to the fuel pump outlet and tighten the fitting.
Check for fuel leaks.
Replacing the fuel filter and fuel pump
Relieve pressure in the fuel lines and hoses by doing the following:
Remove the rear seat cushion and disconnect the fuel pump electrical connector.
Start the engine, wait until the engine stops, turn off the ignition.
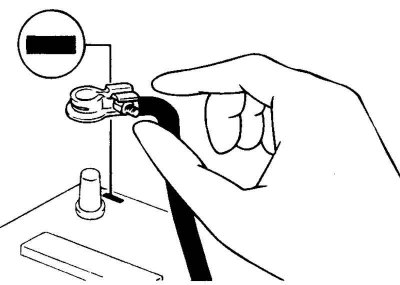
Fig. 2.214. Removing the negative terminal of the battery
Disconnect the terminal from the negative ("–") terminal of the battery (Fig. 2.214).
Connect the fuel pump electrical connector.
Loosen the eye bolts while holding the fuel filter mounting nuts from turning.
Note: Cover the fuel filter with a cloth to prevent any remaining fuel from leaking out.
Loosen the fuel filter mounting bolts and remove the filter from the mounting clamp.
After replacing the fuel filter, check for fuel leaks.
Replacing the overflow limiter (two-position valve)
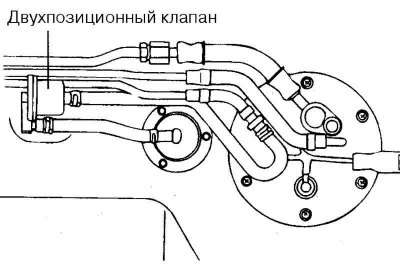
Fig. 2.215. Overflow limiter (two-position valve)
Disconnect the fuel vapor discharge hose (Fig. 2.215), then remove the overflow limiter.
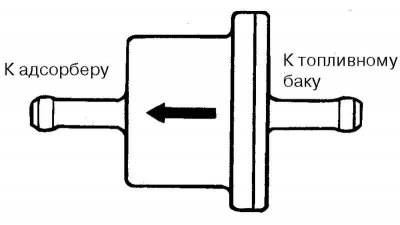
Fig. 2.216. Installation position of the overflow limiter
Attach the overflow limiter to the fuel lines in the correct position (Fig. 2.216).
Replacing the fuel level indicator sensor
Remove the fuel tank filler cap to relieve pressure in the tank.
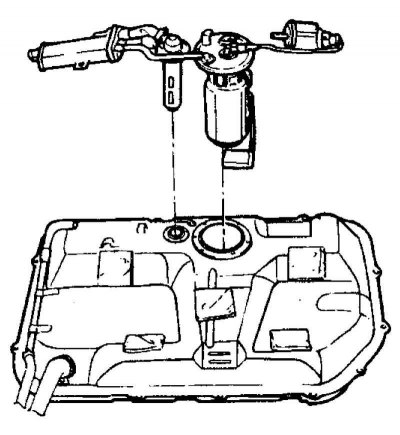
Fig. 2.217. Fuel level indicator sensor and fuel pump
Loosen the screws securing the fuel level indicator sensor and remove the sensor from the tank (Fig. 2.217).