
Contents: Removal, checking and installation…⇓ Examination ⇓ Installation ⇓ Operation of the positive crankcase…⇓
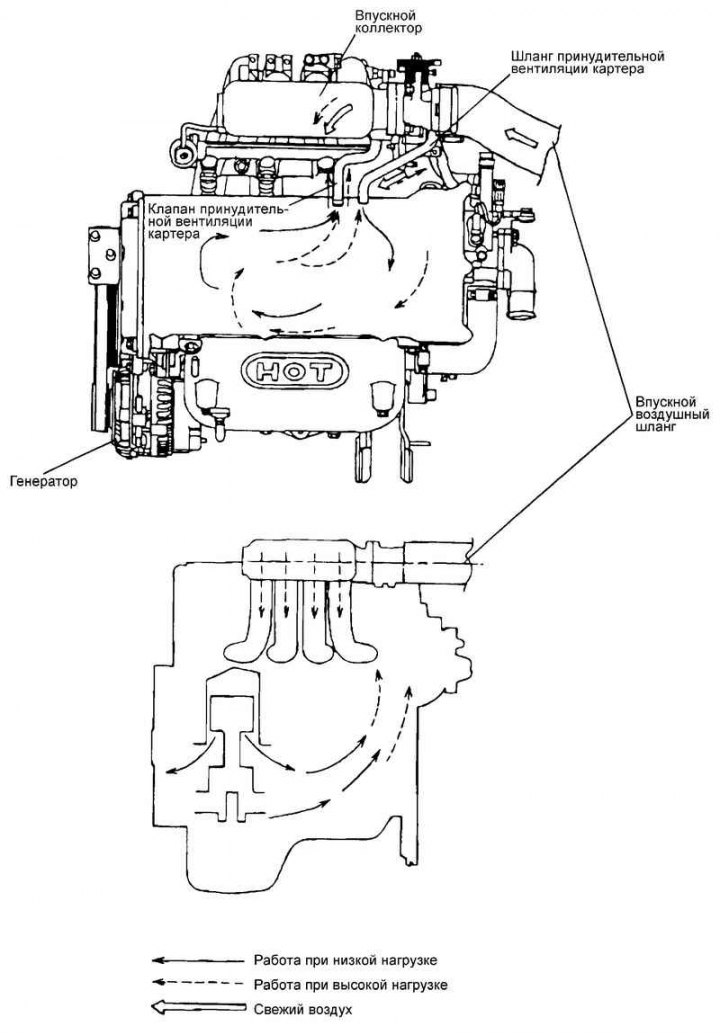
Fig. 2.218. Forced crankcase ventilation system
Removal, checking and installation the positive crankcase ventilation valve
Disconnect the ventilation hose from the positive crankcase ventilation valve. Remove the valve from the cylinder head cover and connect it to the ventilation hose.
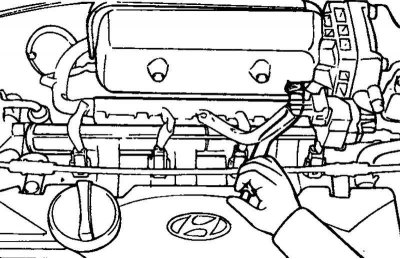
Fig. 2.219. Checking the intake manifold vacuum
Start the engine and let it idle. Cover the valve hole with your finger and make sure that you feel a vacuum from the intake manifold (Fig. 2.219).
Note: At this point, the PCV valve plunger will move back and forth.
Examination
Remove the positive crankcase ventilation valve.
Insert a thin rod into the positive crankcase ventilation valve from the threaded side and, by moving the rod back and forth, check that the plunger moves.
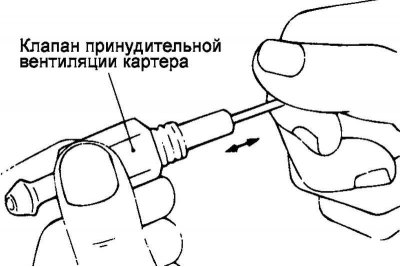
Fig. 2.220. Checking the plunger of the positive crankcase ventilation valve
If the plunger does not move, there are deposits in the positive crankcase ventilation valve (Fig. 2.220). In this case, it is necessary to clean or replace the valve.
Installation
Install the positive crankcase ventilation valve in place and tighten it to the specified torque.
Tightening torque of the positive crankcase ventilation valve: 8–12 N·m.
Operation of the positive crankcase ventilation valve
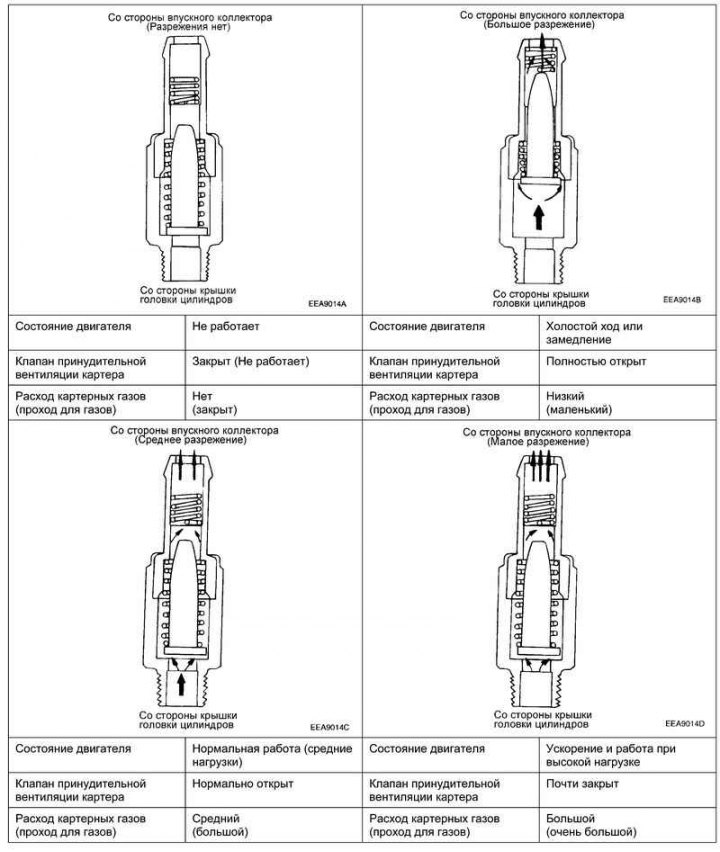
Fig. 2.221. Diagram of the operation of the forced crankcase ventilation valve
The operation diagram of the forced crankcase ventilation valve is shown in Fig. 2.221.