
Removal
1. Remove the oil filter.
2. Remove the oil pan.
3. Remove the oil receiver and gasket.
4. Remove the relief valve plug and gasket, and then remove the relief valve spring and plunger from the oil filter bracket.
5. Remove the four oil filter bolts and remove the oil filter bracket and gasket.
6. Remove the plug cap from the front cover in the area where the oil pump is located.

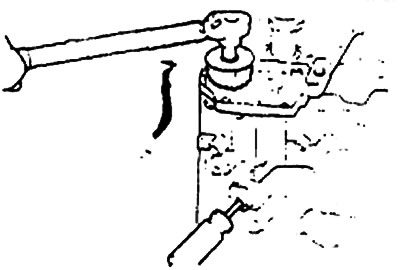
7. Remove the plug from the left side of the cylinder block and insert an 8 mm screwdriver into the opening. The screwdriver shaft should enter the opening to a depth of more than 60 mm.
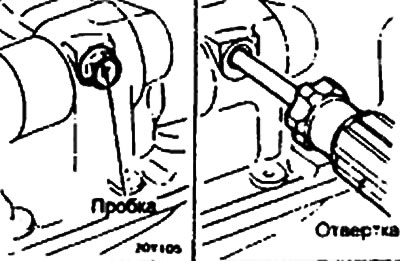
8. Remove the oil pump driven gear and the left balance shaft mounting bolt.
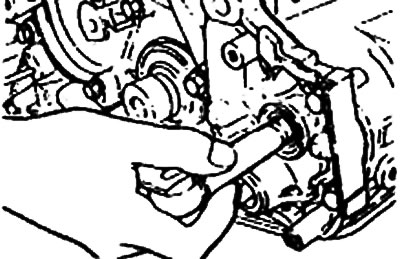
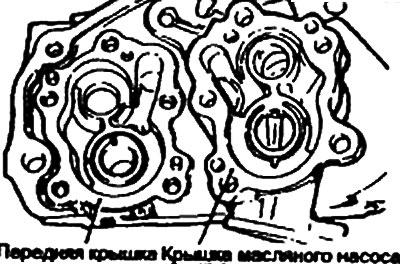
9. Unscrew the front cover bolts and remove it and the gasket.
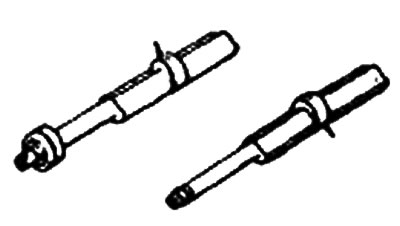
10. Remove the two cylinder balance shafts.
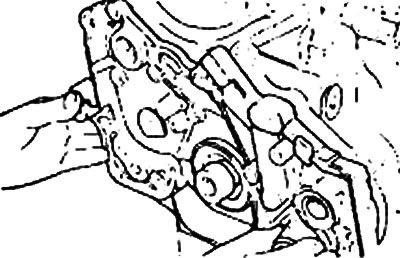
11. Remove the oil pump cover.
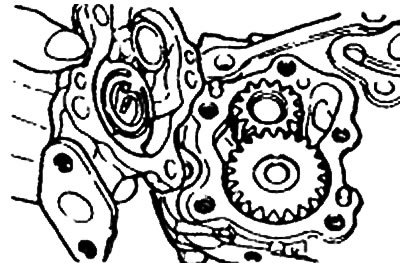
12. Remove the oil pump gears.
Examination
Oil pump
1. Visually inspect the gear contact surfaces for stepped wear. If the front cover or oil pump cover has excessive stepped wear, replace the front cover assembly.
2. Check that the oil passages of the front cover and oil pump cover are not clogged and clean them if necessary.
Balance shaft
Inspect journals for wear and scoring. If excessive wear or scoring is present, inspect bearings. Replace balance shaft, bearing, or both as needed.
Seals
Check the seals installed in the front cover for damage or wear of the working edges. Replace defective seals.
Plunger and spring of the pressure reducing valve.
1. Insert the plunger of the pressure relief valve into the hole of the oil filter bracket and check that it moves smoothly. If necessary, clean the plunger or replace it.
2. Check the length of the spring in a free state, replace the spring if it is excessively compressed.
- The length of the pressure reducing valve spring in a free state is 46.6 mm
Balance shaft bearing
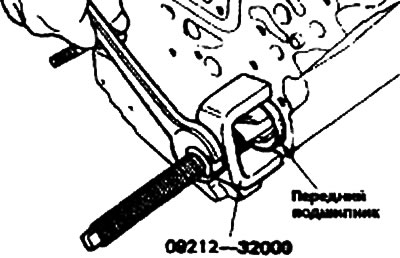
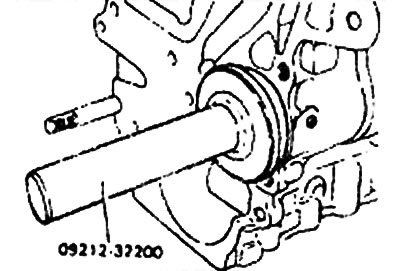
1. Using a special tool (09212—32000), remove the front bearing of the right balance shaft from the cylinder block.
2. Using a special tool (09212—32100), remove the left balance shaft rear bearing from the cylinder block. At this time, install the special tool (094212—32300) on the front surface of the cylinder block to hold the bearing puller.
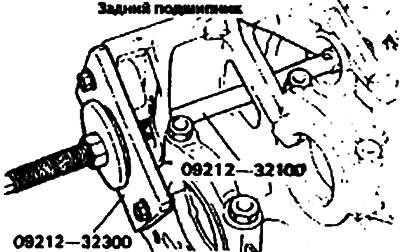
3. Using a special tool (094212—32300), install the left balance shaft rear bearing using the special tool (09212—32300), used when removing the bearing.
Warning: Apply engine oil to the inner surface of the bearing before installing it.
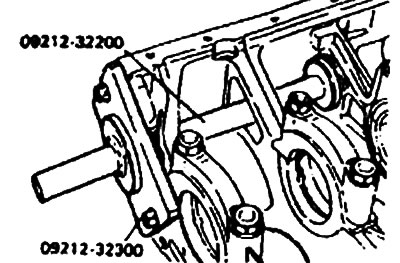
4. Using a special tool (09212—32200), install the front bearing of the right balance shaft.
Installation
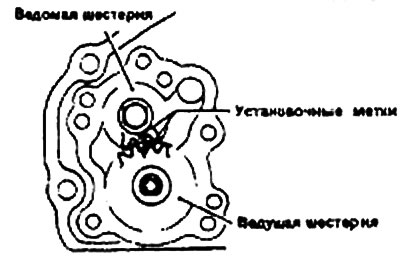
1. Timing marks are located on the back of each gear.
2. Install the oil pump cover and tighten the five bolts.
- Tightening torque: Oil pump cover bolts - 15-18 Nm
3. Insert the left balance shaft into the hole of the oil pump driven gear and temporarily tighten the bolt.
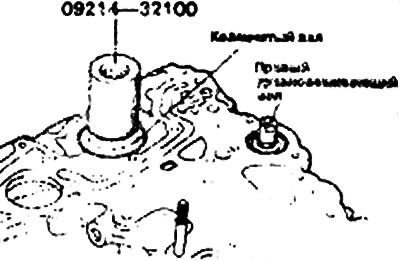
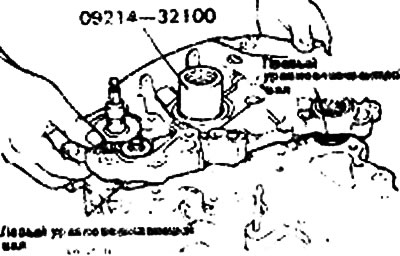
4. Install the special tool (09214-32100) onto the front end of the crankshaft and lubricate it with engine oil. The seal guide has a conical outer surface. Install the guide so that the end with the smaller diameter faces the front of the engine.
Note: If the front crankshaft oil seal is already installed, use the special tool (094214-32100) to protect the seal.
5. Install the right balance shaft into the cylinder block.
6. Install the new front cover gasket.
 |
 |
7. When installing the left balance shaft into the cylinder block, install the front cover.
8. Insert a screwdriver into the hole on the left side of the cylinder block to hold the shaft in a certain position, then tighten the fastener.
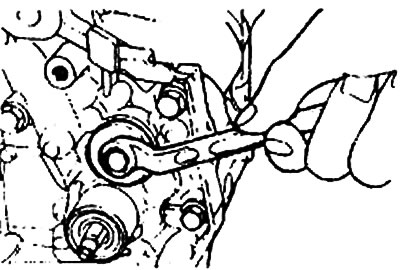
9. Install the oil filter bracket and gasket, then tighten the front cover mounting bolts.
Tightening torque:
- Front cover bolts - 20-27 Nm
- Oil filter bracket bolt - 15-22 Nm
10. Install the plug cap.
11. Install the pressure relief valve plug and gasket and tighten the plug.
12. Install the oil receiver and gasket.
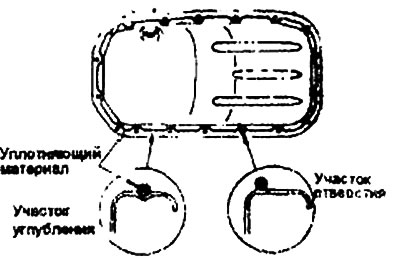
13. Clean the mating surfaces of the cylinder block and oil sump.
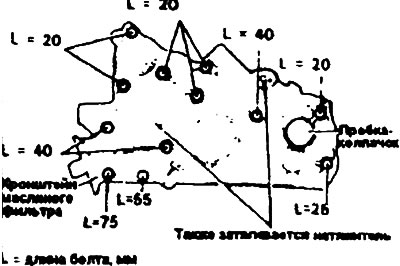 |
 |
14. Apply sealing material to the recess of the oil pan flange.
15. Install the oil pan and tighten the bolts to the specified torque.