
Contents: Examination ⇓ Troubleshooting Guide ⇓ Checking spark plugs ⇓ Checking the high voltage spark plug…⇓
Disconnect the cable from the negative (–) battery terminal.
Remove the airbag module.
Caution! The SRS system is designed so that sufficient voltage remains for 30 seconds after the battery is disconnected to deploy the airbag. Therefore, if work related to the SRS system is performed immediately after the battery is disconnected, unintentional deployment of the airbag may result in serious injury.
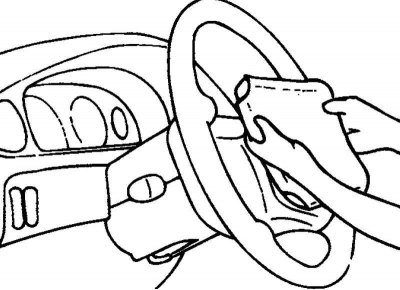
Fig. 7.5. Removing the horn switch cover
Unscrew the screw and remove the horn switch cover (Fig. 7.5).
Loosen the lock nut and remove the washer.
Pull the dynamic damper (supplemental restraint system clock spring) forward and upward, then remove it.
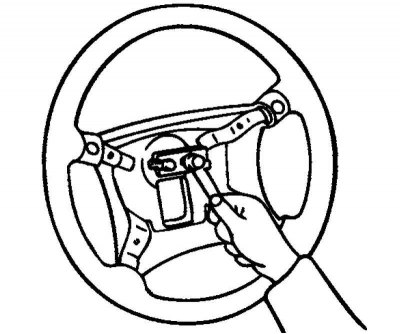
Fig. 7.6. Removing the steering wheel
Install the special tool (09561-11001) on the steering wheel and remove the steering wheel (Fig. 7.6).
Caution! Do not use the impact method (with a hammer) to remove the steering wheel.
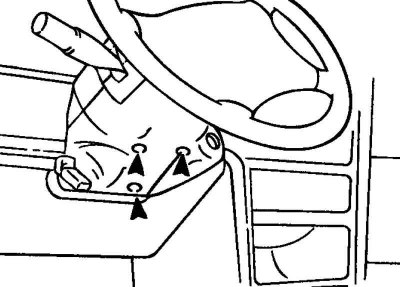
Fig. 7.7. Steering column lower casing mounting bolts
Remove the upper and lower steering column casings (Fig. 7.7).
Remove the lower instrument panel cover.
Disconnect the wiring connectors and remove the steering column combination switch.
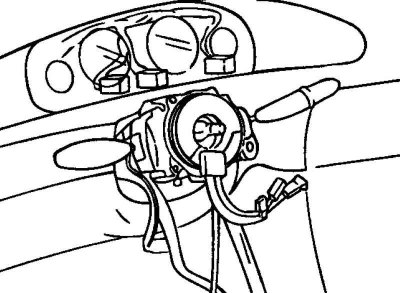
Fig. 7.8. Removing the ignition switch
Loosen the mounting bolts and separate the ignition switch from the steering column (Fig. 7.8).
Examination
Disconnect the ignition switch connector located under the steering column.
Check the condition of the circuit between the connector terminals.
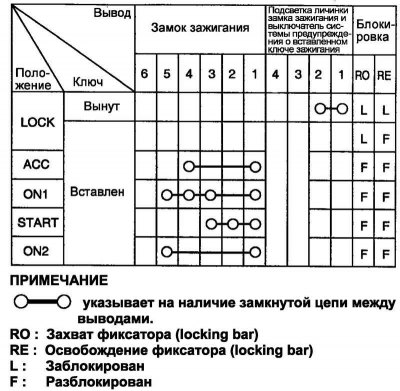
Fig. 7.9. Table for checking the condition of the circuit between the terminals of the ignition switch connector
If the circuit condition differs from that specified, replace the ignition switch (Fig. 7.9).
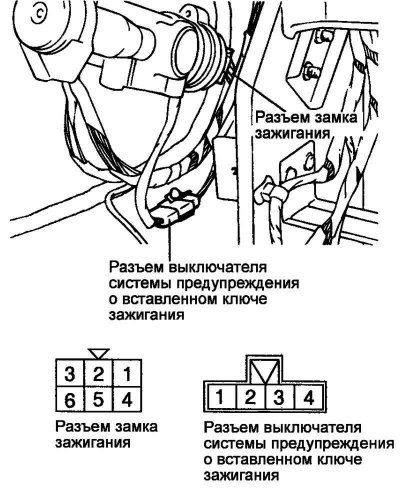
Fig. 7.10. Ignition switch connector terminals
Troubleshooting Guide
If the engine crankshaft does not turn over with the starter when the ignition switch is in the "START" position, determine whether the starter interlock switch (automatic transmission selector switch) is in the "P" ("PARK") or "N" position ("NEUTRAL").
If the starter lock (the "NO-CRANK" condition) appears only in one of the positions of the automatic transmission selector lever, then most likely the cause is an incorrect adjustment or a malfunction of the starter lock switch.
Checking spark plugs
Connect the high tension spark plug wire to the spark plug removed from the cylinder head.
Connect the outer electrode (housing) of the spark plug to the ground (to the bracket on the engine) and turn the engine crankshaft with the starter.
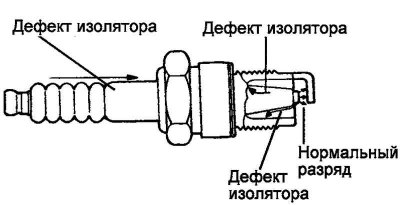
Fig. 7.11. Spark plug defects
Make sure that a spark jumps between the spark plug electrodes (Fig. 7.11).
Caution: When replacing a spark plug, the new spark plug must have a built-in resistor.
Checking the high voltage spark plug wires
With the engine idling, disconnect the spark plug high-tension wires from the spark plugs one by one. Check for any changes in engine performance.
Spray water mist onto the secondary spark plug wire and check for voltage leaks if there are cracks in the spark plug wires.
Attention! Perform the test wearing rubber gloves.
If there are no changes in engine operation, measure the spark plug resistance and check the spark plug itself.
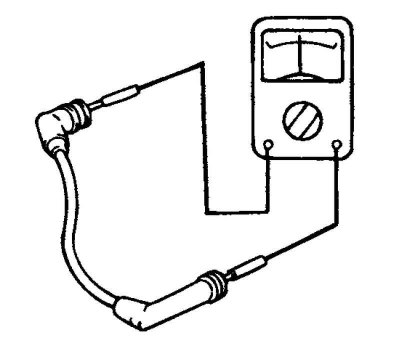
Fig. 7.12. Checking the cap and insulation
Check the cap and insulation of the high-tension spark plug wire for cracks (Fig. 7.12).
Measure the resistance of the high tension spark plug wire.
For 2.7L engine

Note: The resistance of the high-tension spark plug wire should not be higher than 10 kOhm per meter of wire length. If the wire resistance is higher than the specified value, replace the wire.