
Disassembly
1. Remove the clamping ring using a special tool (09432-21201).
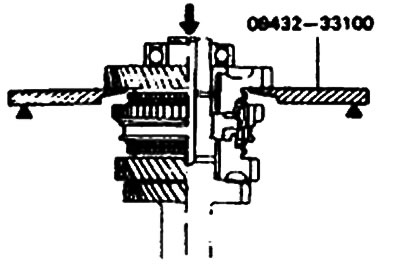
2. Remove the tapered roller bearing, first gear, bearing sleeve and needle bearing using the special tool (09432—33100).
Warning:
- 1. Do not reuse bearings removed from the shaft
- 2. Replace the inner and outer races of the tapered roller bearing as a set
- 3. Remove the first-second gear synchronizer assembly, second speed gear, needle bearing as a unit using the special tool (09432-33100).
- 4. Remove the tapered roller bearing using the special tool.
Examination
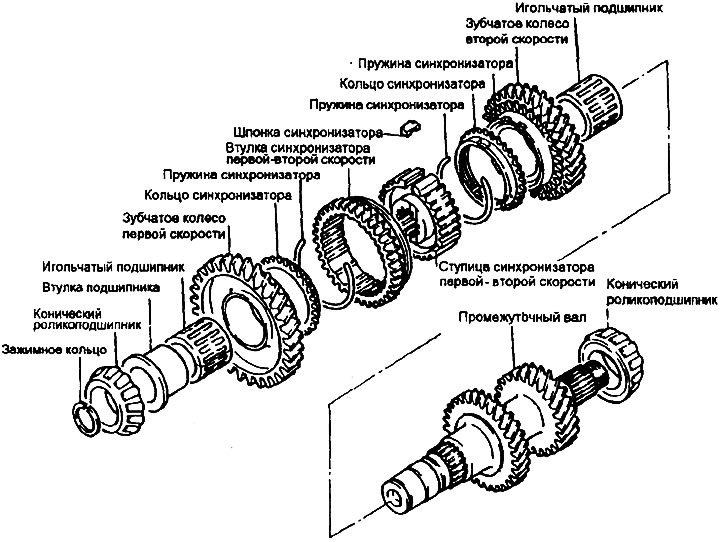
Intermediate shaft
1. Check the outer surface of the intermediate shaft where the needle bearing is mounted for excessive wear or damage.
2. Check that the shaft splines are not damaged or worn.
Needle bearing
1. Assemble the needle bearing with the shaft or bearing sleeve and gear and check whether it rotates smoothly without noise or beating.
2. Check the needle bearing separator for deformation.
Synchronizer ring
1. Check the synchronizer teeth for damage or breakage.
2. Check whether the inner surface is damaged, worn or the threads are damaged.
3. Press the synchronizer ring towards the clutch toothed wheel and check the gap between their ends. If the gap goes beyond the limit value, replace the ring.
- Limit value: 0.5 mm
Synchronizer bushing and hub
1. Assemble the synchronizer sleeve with its hub and check if it moves smoothly.
2. Check the bushing for damage on its inner front and rear surfaces.
3. Check the wear of the end surfaces of the hub (in contact with each gear wheel).
Warning: Replace the hub and synchronizer bushings as a set.
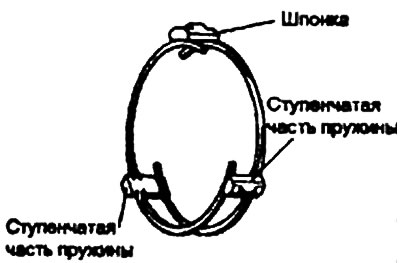
Synchronizer key and spring
1. Check the wear of the central protrusion of the synchronizer cracker.
2. Check the spring for weakening, deformation or breakage.
Transmissions
1. Check the helical gear teeth and synchronizer sleeve for damage and wear.
2. Check the synchronizer cone for surface defects, damage or wear.
3. Check the gear bore, front and rear ends for damage and wear.
Assembly
1. Install the tapered roller bearing on the intermediate shaft using a special tool (09432—33300).
Caution: When installing the bearing, apply pressure only to the inner race.

2. Install the first synchronizer ring taking into account the identification mark.
3. Combine the hub and the first-second speed synchronizer sleeve.
4. The synchronizer sleeve has teeth that are interrupted in six places.
Assemble this sleeve and hub so that the central tooth "T" between the two interrupted groups of teeth contacts the key (cracker) of the synchronizer.
5. Install the synchronizer spring so that its protrusion enters the groove in the synchronizer key.
Caution: When installing the synchronizer springs, make sure that the front and rear springs are not positioned in the same direction.
6. Install the needle bearing, second speed gear, first-second speed synchronizer unit on the intermediate shaft using the special tool (09432-33300).
Warning:
- 1. When installing the synchronizer unit, ensure that the synchronizer keys are correctly positioned in the corresponding grooves of the synchronizer ring.
- 2. After installing the synchronizer unit, check whether the third speed gear rotates smoothly.
7. Install the needle bearing, first gear wheel, and bearing sleeve together using the special tool (09432—33300), as shown in the figure.
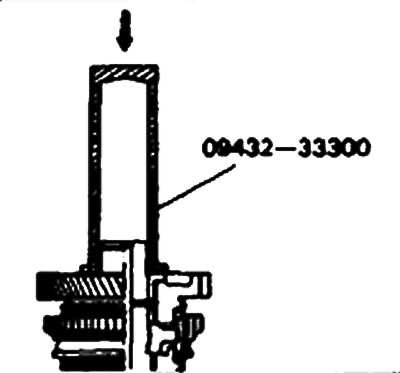
8. Install the tapered roller bearing using the special tool (09432—33300).
Caution: When installing the bearing, apply pressure only to the inner race.
9. Install the clamping ring.