Removal and installation
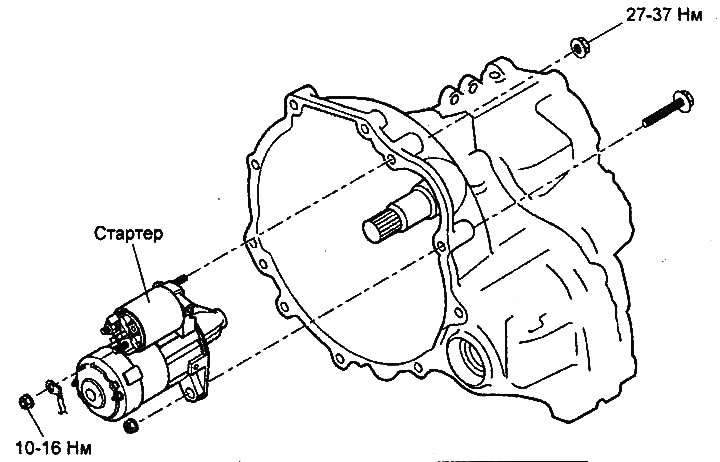
Removing and installing the starter assembly
1. Disconnect the cable from the negative terminal of the battery.
2. Disconnect the speedometer drive cable and gear shift cable.
3. Disconnect the starter wire harness connector and the starter lead wire.
4. Remove the starter assembly.
5. Installation is carried out in the reverse order of removal.
Disassembly
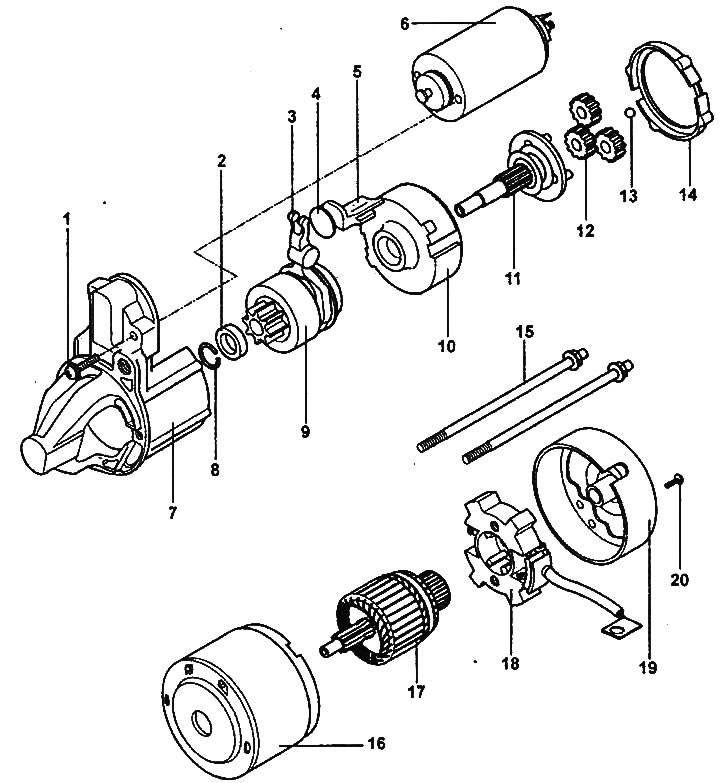
Disassembling the starter.
1 - screw, 2 - limiting ring, 3 - lever, 4 - plate, 5 - stop, 6 - starter traction relay, 7 - front bracket assembly, 8 - retaining ring, 9 - overrunning clutch, 10 - internal gear, 11 - carrier, 12 - satellite, 13 - ball, 14 - sealing ring, 15 - tie bolt, 16 - pole with stator winding assembly, 17 - starter anchor, 18 - brush holder, 19 - rear bracket, 20 - screw.
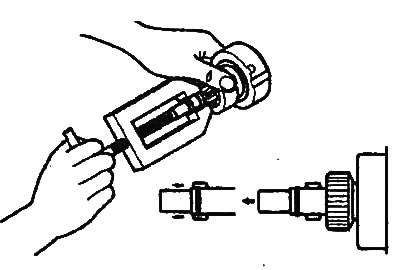
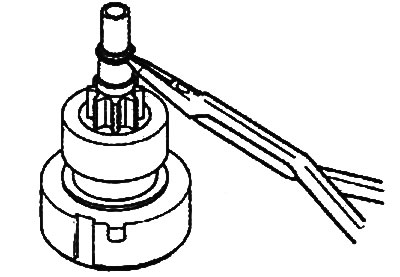
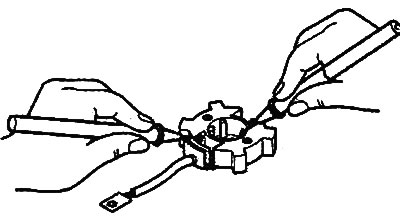
To remove the overrunning clutch from the starter armature shaft, it is necessary to remove the retaining and limiting rings.
- a) Using a suitable mandrel, push the stop ring down.
- b) Using special pliers, remove the retaining ring, then remove the limiting ring and the starter overrunning clutch.
Checking (after disassembly)
Checking for the absence of a short circuit of the armature winding to "ground"
Using an ohmmeter, check for a closed circuit between each commutator plate and the anchor core. If the circuit is closed (resistance tends to zero), replace the starter anchor assembly.
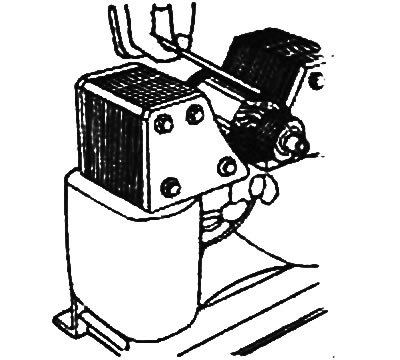
Checking for short circuit in armature winding
Install the anchor in the device for checking the winding of the starter and generator). If there are signs of a short circuit, then replace the anchor. If the thin steel plate located near the anchor body vibrates when the anchor of the starter rotates, then
the armature winding is short-circuited.
Checking for breaks in the armature winding
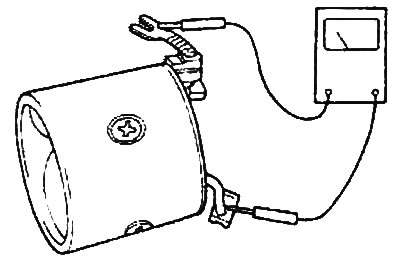
Using an ohmmeter, check for a closed circuit (resistance) between the collector lamellas. If the circuit is open, there is a break in the anchor winding.
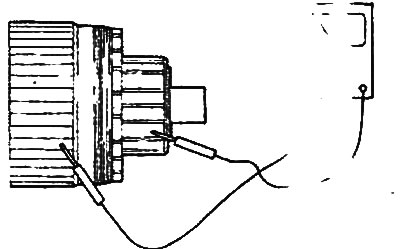
Checking for breaks in the stator winding
Using an ohmmeter, check for a closed circuit between the brush wires. If the circuit is open, there is a break in the stator winding. In this case, replace the starter housing with the stator winding.
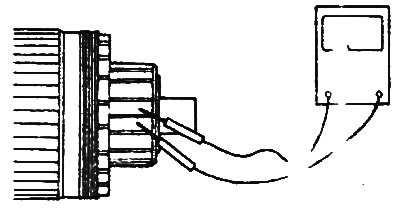
Checking for the absence of a short circuit of the stator winding to "ground"
With the winding installed on the stator, check for a closed circuit between the brush terminal (stator winding) and the starter housing using an ohmmeter. If the circuit is closed, replace the starter housing assembly with the stator winding.

Checking the collector
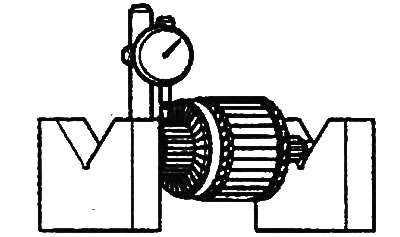
1. Place the starter armature on two V-blocks and measure the radial runout of the commutator using a dial indicator.
- Nominal value: 0.05 mm
- Maximum permissible value: 0.10 mm
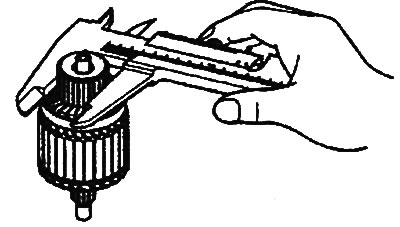
2. Measure the outside diameter of the manifold.
- Nominal value: 29.4 mm
- Maximum permissible value: 28.4 mm
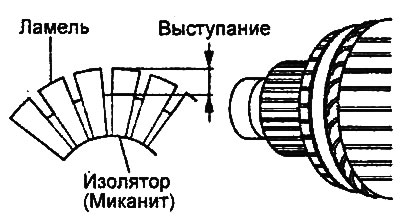
3. Check the protrusion of the collector lamellas above the insulator.
- Nominal value: 0.5 mm
- Maximum permissible value: 0.20 mm
Checking the brush holder
Check for a short circuit between the plate (plus) of the brush holder and the brush holder. If the circuit is shorted, replace the brush holder assembly.
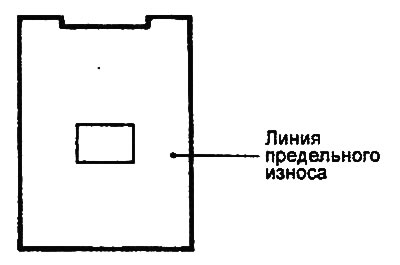
Checking the brush
1. Brushes that are worn below the wear limit line or are oily should be replaced.
2. To replace the brushes, carefully crumble the old brushes with pliers so as not to damage the brush wires.
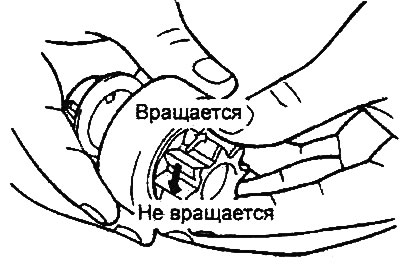
Checking the overrunning clutch
1. Rotate the pinion gear while holding the overrunning clutch housing. The gear should rotate smoothly, without jamming in one direction, and should not rotate in the opposite direction.
2. Check the condition of the starter pinion teeth. If there is wear, scoring or chipping of the teeth, replace the overrunning clutch assembly. If the pinion is damaged, check the condition of the flywheel ring gear (models with manual transmission) or torque converter (models with automatic transmission) for scoring or excessive wear.
Replacing brushes
1. Remove the worn brush, being careful not to damage the brush wire.
2. Sand the end of the brush wire to ensure a strong soldering joint.
3. Insert the conductor into the hole of the new brush and solder it. Make sure that the end of the conductor and excess solder do not protrude beyond the surface of the brush.
4. When replacing the negative brush, pull the brush out of the brush holder by pulling the retaining spring.

Replacing the front and rear bracket bushings
Check the bushings for excessive wear or scoring. If any defects are found, replace the front or rear starter bracket assembly.
Assembly
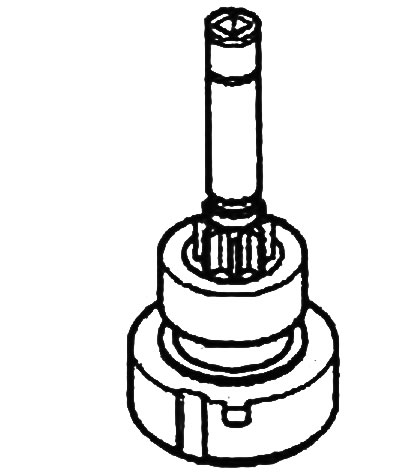
1. Install the overrunning clutch onto the front end of the starter armature shaft.
2. Install the limiting ring first, then the retaining ring onto the front end of the starter armature shaft. Push the overrunning clutch limiting ring onto the retaining ring until it stops.