Fig. 6.38. Rear disc brake components: 1 – guide pin; 2 – guide pin; 3 – bushing; 4 – caliper bracket (with brake pads); 5 – anther; 6 – boot clamp; 7 – piston dust cover; 8 – piston; 9 – piston sealing ring; 10 – support; 11 – brake shoe; 12 – brake shoe; 13 – gasket; 14 – retainer
The components of the rear disc brake are shown in Fig. 6.38.
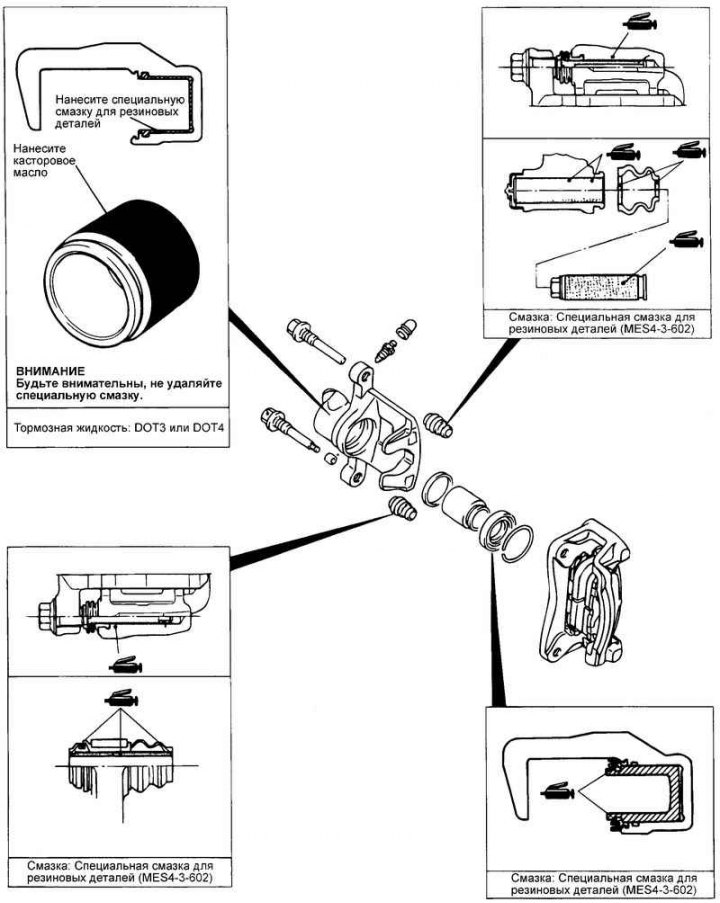
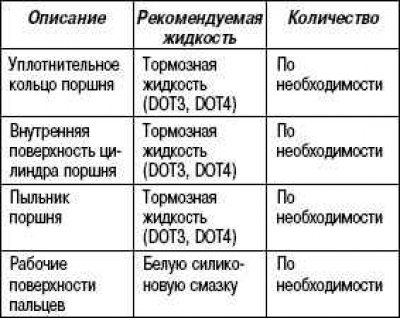
Fig. 6.39. Map of lubrication points
Disassembly
Remove the wheel.
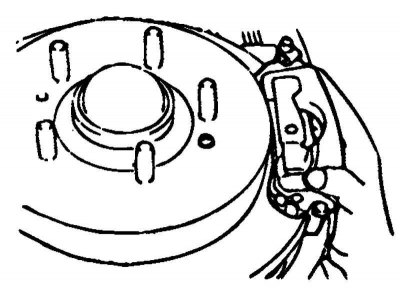
Fig. 6.40. Removing the brake pads
Remove the guide pins, lift the caliper assembly up and remove the pads assembly (Fig. 6.40).
When disassembling the rear disc brakes, disassemble from both sides of the car (left and right).
Removing the piston seal ring and piston.
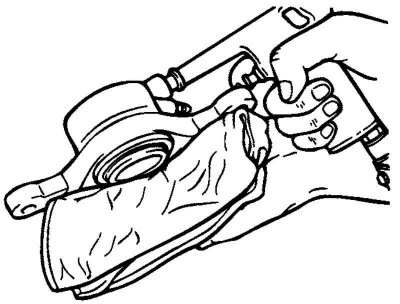
Fig. 6.41. Removing the piston
Wrap the caliper with a cloth. Apply compressed air to the brake hose hole to remove the piston and piston dust boot. Remove the piston seal ring and piston (Fig. 6.41).
Caution! Apply compressed air gradually.
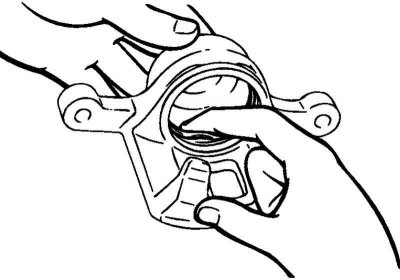
Fig. 6.42. Removing the piston sealing ring
Use your finger to remove the piston sealing ring (Fig. 6.42).
Caution: To prevent damage to the inner surface of the wheel cylinder, do not use a flat-head screwdriver or other tool.
Clean piston and cylinder surfaces with trichloroethylene, alcohol or recommended brake fluid.
Brake fluid used: DOT3 or DOT4.
Examination
Check the brake cylinder for signs of wear, damage or rust.
Check the surface of the brake cylinder piston for signs of wear, damage and rust.
Check the caliper bracket and bushing for signs of wear.
Check for damage or oil on the brake pad linings and for damage on the metal pad bases.
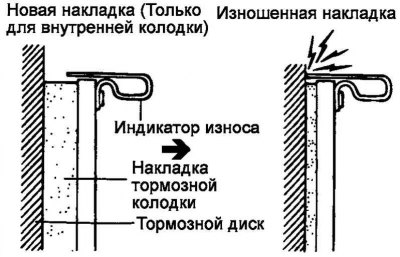
Fig. 6.43. Brake shoe lining test diagram
Check the brake shoe linings for excessive wear and oiling of the friction surface. Replace the brake shoes if necessary (Fig. 6.43).
Note: If it is necessary to replace the brake shoe and lining assembly, replace the entire set of brake shoes on the left and right sides of the vehicle.
Brake shoe lining thickness (maximum permissible value): 2 mm
Check the piston and its inner surface for signs of wear, damage and rust.
Replace damaged parts if necessary.
Check the piston seal ring, piston dust boot and guide pin dust boots for signs of wear or damage.
Assembly
When disassembling the caliper, use only new piston seal ring and piston dust boot.
Apply the recommended fluid to the working surfaces of the piston seal ring and piston. Install the piston seal ring into the groove of the caliper bore, try to ensure that the seal ring is not twisted.
Install the piston dust boot onto the piston.
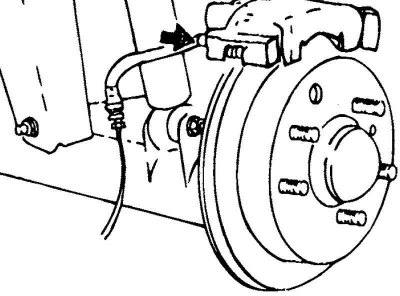
Fig. 6.44. Installing the piston in the caliper
Install the piston and piston dust boot into the caliper (Fig. 6.44). Insert the dust boot clamp into the caliper and check the fit of the dust boot in the groove around the circumference of the piston.
Apply the recommended oil to the inside surface of the guide pin boot.
Removal the brake disc
Remove the wheel.
Remove the caliper assembly and hang it with wire.
Then loosen the two disk screws and remove the disk.
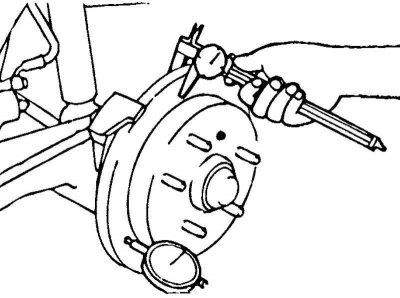
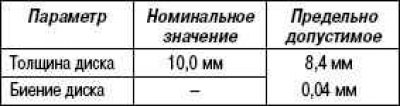
Fig. 6.45. Checking the thickness of the brake disc
Check the disc for signs of wear or damage and replace it if necessary (Fig. 6.45).