
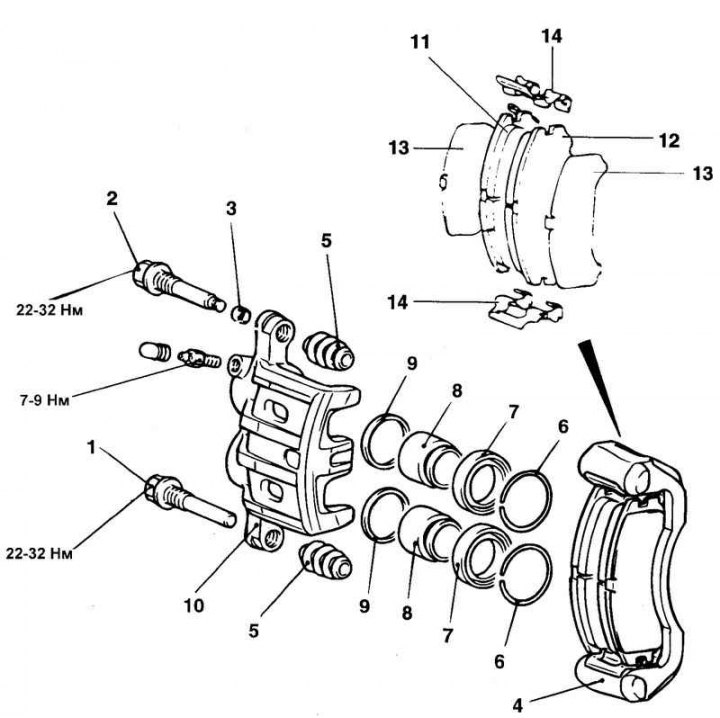
Fig. 6.32. Front disc brake components: 1 – guide pin; 2 – guide pin; 3 – bushing; 4 – caliper bracket (with brake pads); 5 – anther; 6 – boot clamp; 7 – piston dust cover; 8 – piston; 9 – piston sealing ring; 10 – support; 11 – brake shoe and wear indicator assembly; 12 – brake shoe assembly; 13 – outer gasket; 14 – retainer
The components of the front disc brake are shown in Fig. 6.32.
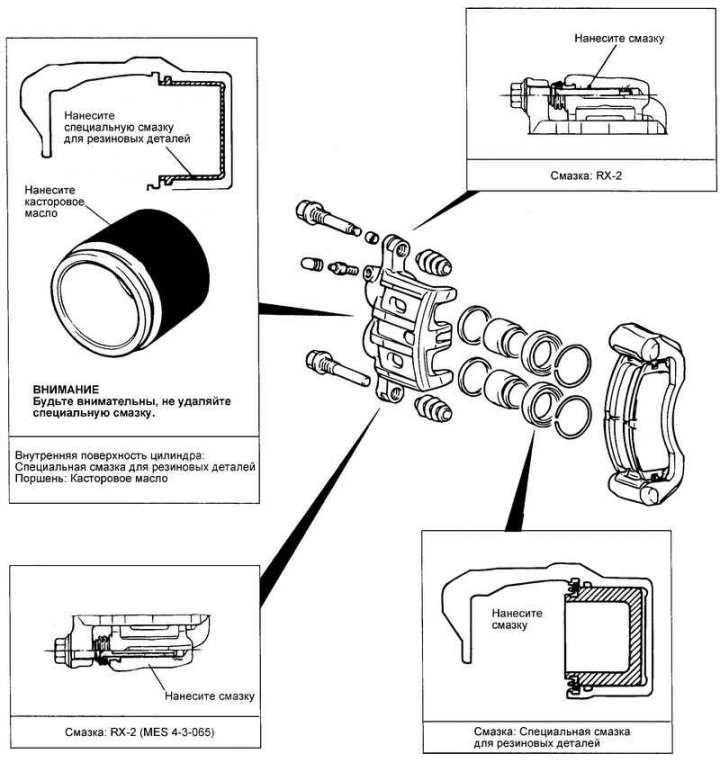
Fig. 6.33. Map of lubrication points
Disassembly
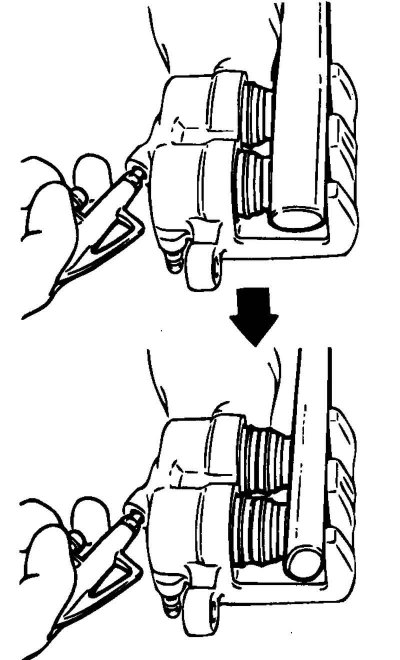
Fig. 6.34. Removing the piston
Apply compressed air to the brake hose hole to remove the piston and piston dust boot (Fig. 6.34). Remove the piston sealing ring and piston.
Caution! Use the handle of a plastic hammer to remove the piston. Apply air gradually so that when removing the pistons from the caliper, their tops are always at the same level.
Caution! Remove the primary and secondary pistons only at the same time, otherwise the secondary piston may become distorted during removal.
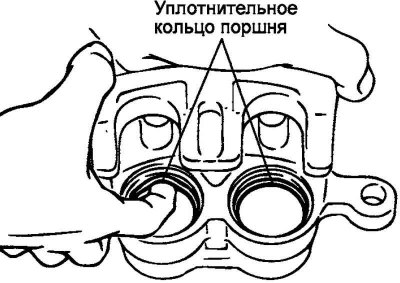
Fig. 6.35. Removing the piston sealing ring
Use your finger to remove the piston sealing ring (Fig. 6.35).
Caution: To prevent damage to the inner surface of the wheel cylinder, do not use a flat-head screwdriver or other tool.
Clean piston and cylinder surfaces with trichloroethylene, alcohol or recommended brake fluid.
Brake fluid used: DOT3 or DOT4.
Examination
Check the brake cylinder for signs of wear, damage or rust.
Check the surface of the brake cylinder piston for signs of wear, damage and rust.
Check the caliper bracket and bushing for signs of wear.
Check for damage or oil on the brake pad linings and for damage on the metal pad bases.
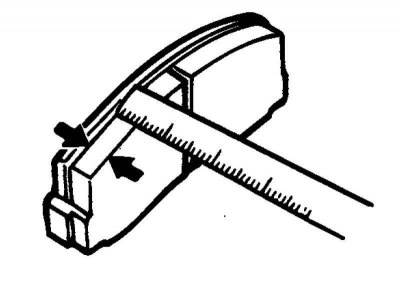
Fig. 6.36. Removing the brake pad thickness
Measure the thickness of the brake shoe lining at the point of greatest wear. If the thickness of the brake shoe lining is less than the maximum permissible value, replace the brake shoes (Fig. 6.36).

Assembly
Wash all parts (except brake pads and brake pad linings) with isopropyl alcohol.
Install the piston seal ring.
After this, apply the recommended brake fluid to the outer surface of the piston, install the piston into the brake cylinder.

Fig. 6.37. Anther installation diagram
Install the piston dust boot and dust boot clamp (Fig. 6.37).
Install the guide pin boots and guide pins.
Install the pads and brake cylinder.
Connect the brake hose to the caliper.
Tightening torque of clamping screw: 7–9 N·m.
Fill the brake fluid reservoir with brake fluid.
Bleed the brake hydraulic system.