
2. Remove the oil pan and oil filter.
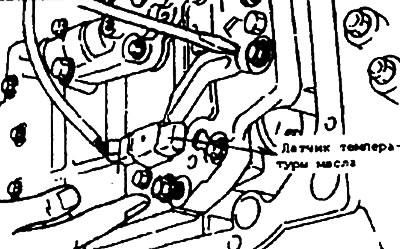
3. Remove the oil temperature sensor.
4. Press the tab of the solenoid valve harness bushing and push it in.
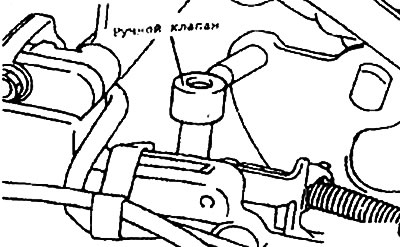
5. Remove the valve body assembly. The manual control valve may fall out, be careful.
6. Turn the adjusting screw of the control valve and adjust it so that the pressure in the system (forced downshift) takes on the standard value.
- Standard value: 870-890 kPa
- Oil pressure change: 38 kPa for each turn of the adjusting screw.
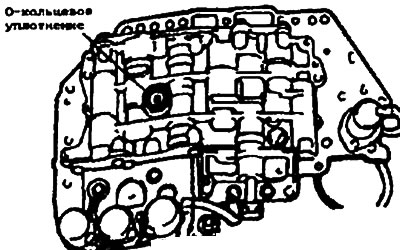
7. Make sure the O-ring is placed on the top side of the valve body as shown in the figure.
 |
 |
 |
 |
8. Replace the O-ring of the solenoid valve connector with a new one.
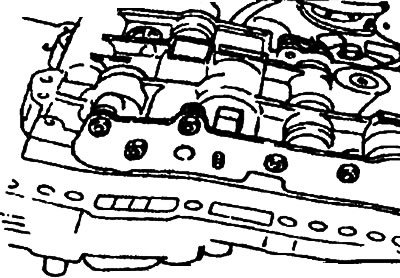
9. Install the valve body assembly into the crankcase, then insert the connector into the crankcase. Make sure that the cutout part of the connector is positioned as shown in the picture. Also, make sure that the wires are not pinched.
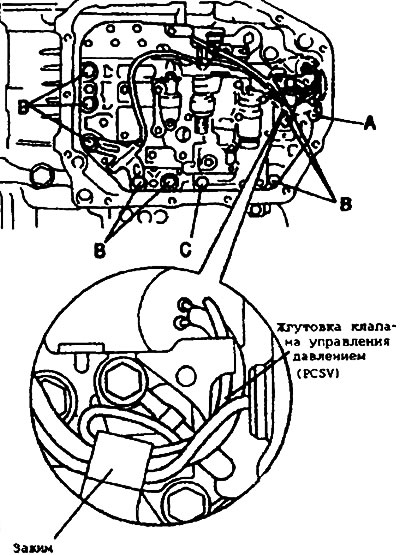
10. Tighten the valve body assembly mounting bolts (10 pieces) to a torque of 10-12 Nm.
- Bolt A: length 188 mm
- B: length 25mm
- C: length 40 mm.
Warning: Secure the solenoid valve and oil temperature sensor harness in the locations shown. This is especially true for the pressure control solenoid valve (PCSV) harness, which must be routed and secured separately from the others.
11. Install the oil filter, new oil pan gasket and the oil pan itself.
12. Add transmission fluid. Measure the system pressure. Adjust if necessary.