HyundaiBook.ru
Repair Chevrolet Repair Honda Repair Toyota Repair Land Rover Repair VAZ Repair Renault Repair Nissan
English Русский
Български
Беларускі
Український
Српски
Hrvatski
Română
Polski
Slovenský
Magyar
ArticlesSitemapContacts  


  Accent   Elantra   Getz   Grandeur   Sonata   Santa Fe   Tucson   Others
Getz (2002-2011)
  • Main
  • Getz
  • 1 (2002-2011)
  • Power unit
  • Cooling system
  • Radiator — removal and installation

Radiator — removal and installation (Hyundai Getz 1)

0
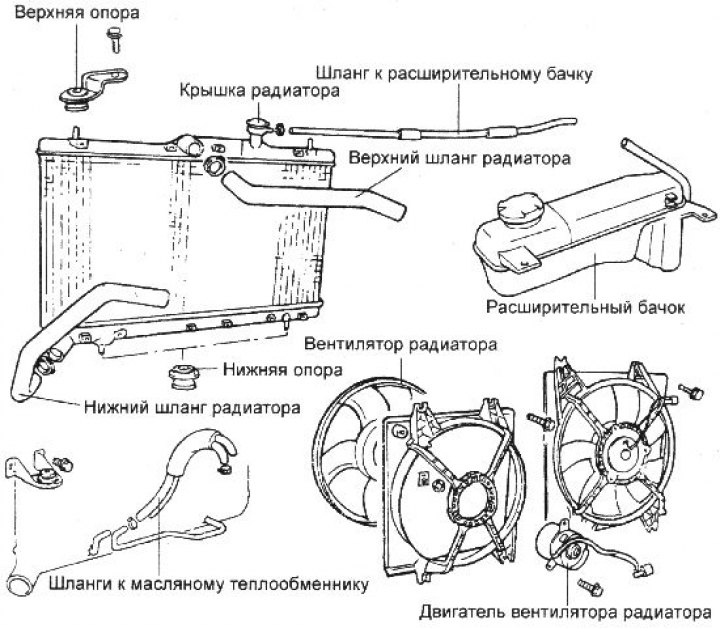
Contents: Removal ⇓ Examination ⇓ Checking the radiator fan motor ⇓ Installation ⇓
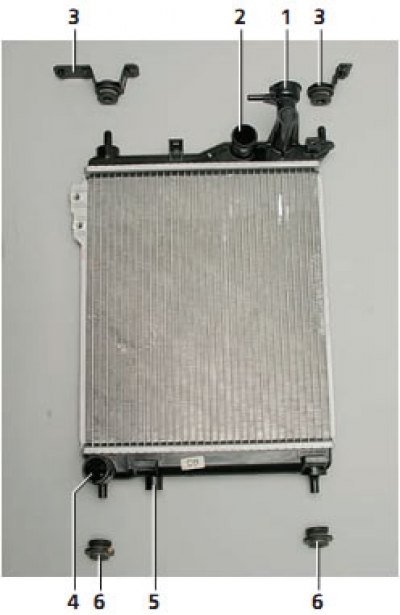
Radiator: 1 - radiator neck; 2 - supply pipe; 3 - bracket with cushion; 4 -…

Radiator: 1 - radiator neck; 2 - supply pipe; 3 - bracket with cushion; 4 - outlet pipe; 5 - drain hole branch pipe; 6 - rubber cushion


Removal


1. Disconnect the wire from the negative terminal of the battery and the connector from the Hyundai Getz radiator fan motor.
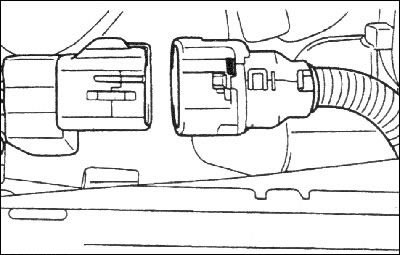
1. Disconnect the wire from the negative terminal of the battery and the…


2. Set the temperature control knob in the car interior to the maximum temperature.
2. Set the temperature control knob in the car interior to the maximum…


2. Set the temperature control knob in the car interior to the maximum…


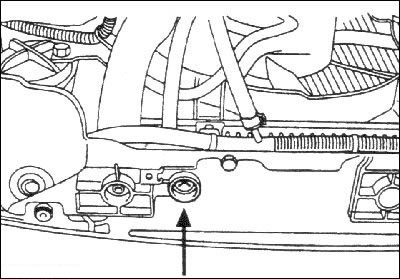
3. Remove the drain plug on the radiator and drain the coolant into a suitable container.


4. Loosen the clamps and disconnect the upper and lower hoses from the radiator.

5. On vehicles with automatic transmission, disconnect the hoses from the oil cooler.
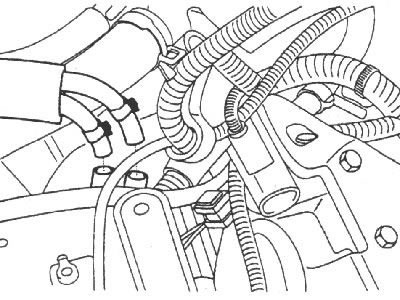
5. On vehicles with automatic transmission, disconnect the hoses from the oil…


Caution: To prevent transmission fluid from leaking out and dirt from entering the system, close the ends of the oil cooler hoses with suitable plugs.
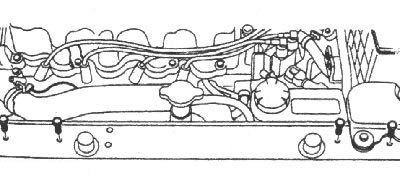

Caution: To prevent transmission fluid from leaking out and dirt from entering…


6. Remove the radiator mounting bolts.

7. Remove the radiator together with the radiator fan.

8. Remove the fan from the radiator.

Examination


1. Check for bent radiator fins. If necessary, straighten the fins using a comb.

2. Check the radiator for cracks, damage and leaks.

3. Check the radiator hoses for cracks, damage or abrasions.

4. Check the expansion tank for damage.

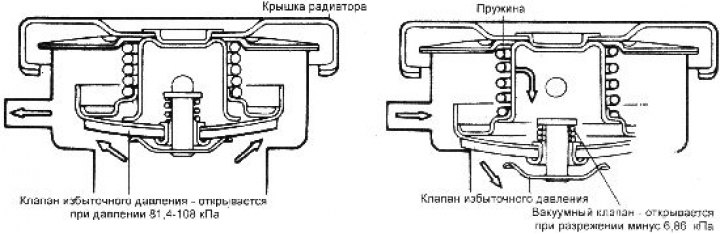
5. Check the radiator cap.


6. Check the opening pressure of the radiator cap valve.

7. Check the radiator cap gasket for cracks or damage.

Checking the radiator fan motor


1. Check that the radiator fan motor rotates when voltage is supplied to it from the battery.
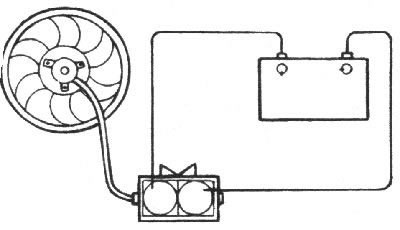
1. Check that the radiator fan motor rotates when voltage is supplied to it…


2. Check that there are no extraneous noises when the engine is running.

Installation


1. Installation is carried out in the reverse order of removal. Fill the cooling system with the required amount of the required coolant.

2. Start the engine and let it run until the thermostat valve opens, then stop the engine.

3. Remove the radiator cap and add coolant to the top of the radiator neck.

4. Check for leaks in the cooling system.
4. Check for leaks in the cooling system.
This article is available at russian, bulgarian, belarusian, ukrainian, serbian, croatian, romanian, polish, slovak, hungarian
This article has been reviewed by: Konstantin Smirnov
Add to social network:

Previous
Getz: Cooling system
Next

Water pump — removal and installation
Cooling system tubes and hoses
Coolant density
Replacing the coolant
Cooling system tightness
Radiator Cap — Check
Thermostat — removal and installation
We recommend other articles on the topic of Hyundai manuals:

Radiator Cap Test Hyundai Accent 1 (1994-1999)
Radiator — removal, cleaning and installation Hyundai Elantra 1 (1990-1995, petrol)
Radiator — removal and installation Hyundai Sonata 3 (1993-1998)
Checking the radiator cap valves Hyundai Santa Fe 2 (2007-2012, petrol)
Checking the radiator cap Hyundai Tucson 1 (2005-2010)
Checking the radiator cap valves Hyundai Matrix (2001-2010, petrol)

Link in different formats to this article

Visitor comments
No comments yet


How much will 26 + 17 ?


Getz (2002-2011) 
  • User manual
  • Control devices
  • Heating and ventilation
  • Audio system
  • Car driving
  • Faults en route
  • Maintenance
  • Technical information
  • Power unit
  • Engine repair 1.1/1.3 l
  • Engine repair 1.5/1.6 l
  • Lubrication system
  • Cooling system
  • Fuel system
  • Exhaust system
  • Ignition system
  • Transmission
  • Clutch
  • Mechanical gearbox
  • Automatic gearbox
  • Drive shafts and axles
  • Chassis
  • Suspension and wheels
  • Steering
  • Brake system
  • Body
  • Exterior (external elements)
  • Interior (internal elements)
  • Air conditioning and heater
  • Electrical equipment
  • Equipment and devices
  • Power devices
  • Electrical circuits
HyundaiBook.ru © 2018-2026 · Mobile version · Sitemap: EN BG BY UA RS HR RO PL SK HU · Administration · Site search · Hyundai owners Accent 1 · Accent 2 · Accent 3 · Elantra 1 · Elantra 2 · Elantra 3 · Getz · Sonata 3 · Sonata 4 · Santa Fe 2 · Tucson 1 · Tucson 2 · Matrix ·
This site uses cookies to optimize its functionality. By continuing, you agree to our terms.