
Disassembly
Warning: Since the automatic transmission consists of a number of precision parts, these parts must be handled with extreme care during development and assembly. A rubber mat must be placed on the work bench and kept clean at all times. Do not use cloth gloves or rags during disassembly. If necessary, use nylon products or paper towels. All removed parts must be completely cleaned. The clutch disc, plastic and rubber parts must be cleaned with automatic transmission fluid, making sure that they are free of dust, dirt, etc.
1. Remove sand, dirt, etc. from the entire surface of the gearbox.
2. Place the gearbox on a workbench with the oil pan facing down.
3. Remove the torque converter.
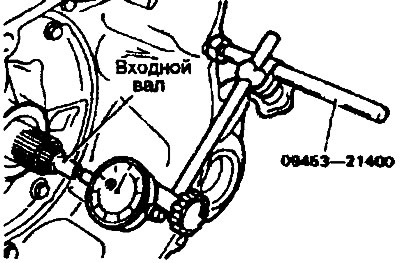
4. Measuring the input shaft end play before disassembly will usually determine if the thrust washer needs to be replaced (except when replacing major components).
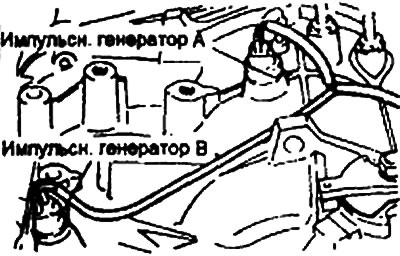
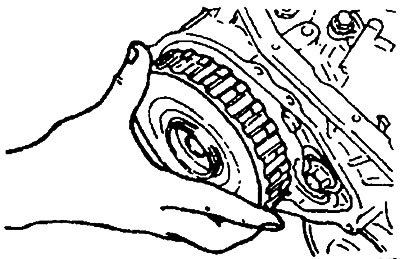
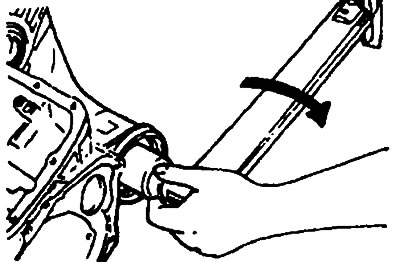
5. Remove pulse generators A and B.
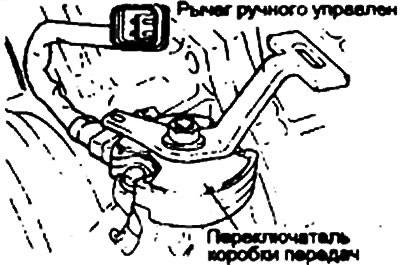
6. Remove the manual control lever, then remove the gear shifter.
 |
 |
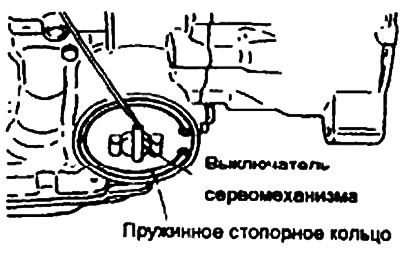
7. Remove the spring lock ring and the switch of the forced downshift servo mechanism.
8. Remove the oil pan and its gasket.
9. Remove the oil filter from the valve body, control.
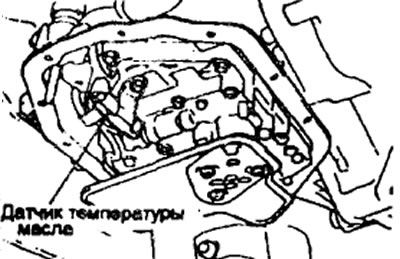
10. Unscrew the oil temperature sensor bolt. Push it out from the connector side.
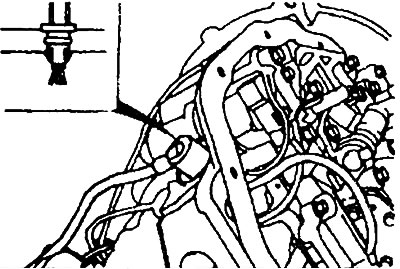
11. Compress the tabs of the solenoid valve wiring seal ring and then push it into the housing.
12. Loosen the bolts and remove the valve body.
13. Remove the end sleeve.
14. Remove the end coupling shaft.
15. Unscrew 14 bolts and remove the torque converter housing.
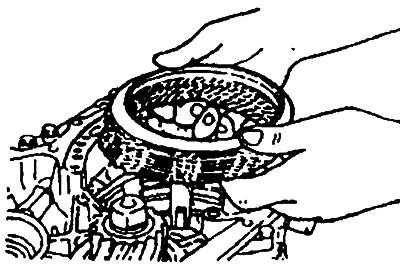
16. Unscrew the 6 oil pump mounting bolts. Screw in the special tools (09452-33100) into two removable holes in the oil pump housing.
Rotate both pullers simultaneously and evenly and remove the oil pump.
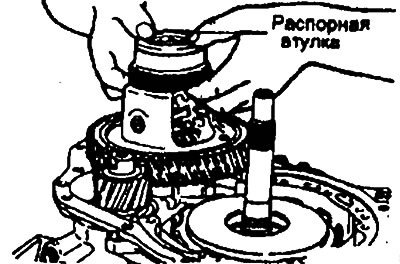
17. Remove the spacer sleeve and differential.
18. Remove the input shaft by moving it upwards, then remove the front and rear couplings.
19. Remove the thrust bearing.
20. Remove the clutch hub.
21. Remove the thrust ring and bearing.
22. Remove the drum of the forced downshift servo mechanism.
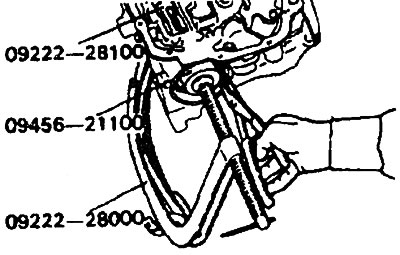
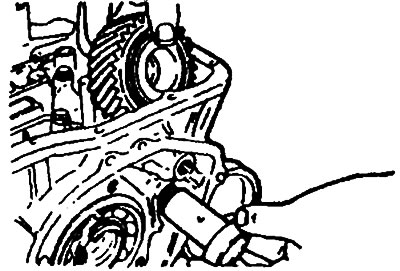
23. Using special tools (09222-28000, 09222-28100, 09456-21100), move the servo mechanism inward and remove the snap ring.
 |
 |
24. Remove the servo piston and spring.
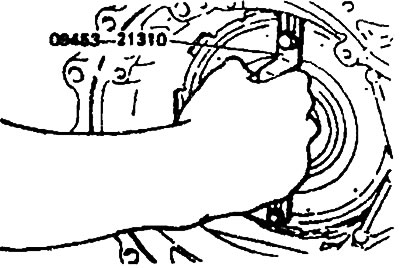
25. Attach the special tool (09453-21310) to the central support. Holding the handle of the tool, pull the central support upward.
26. Remove the reverse and forward gears together.
27. Remove the planetary gear carrier and thrust bearing.
28. Remove the wave spring, return spring, brake disc, brake plate, brake support plate.
 |
 |
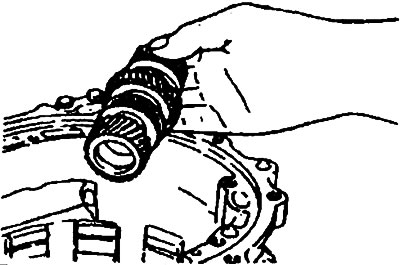
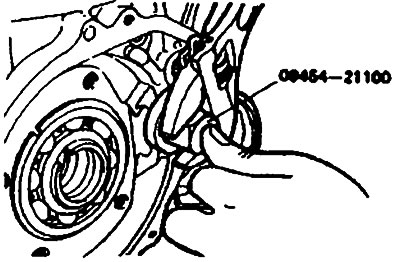
29. Using a special tool (09454-21100), release the intermediate shaft. Remove it and the 2 gear bearing parts.
 |
 |
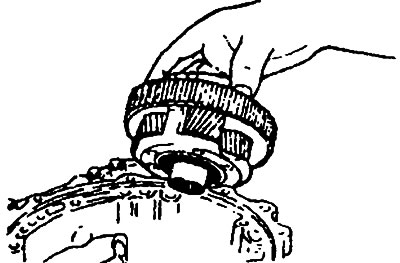
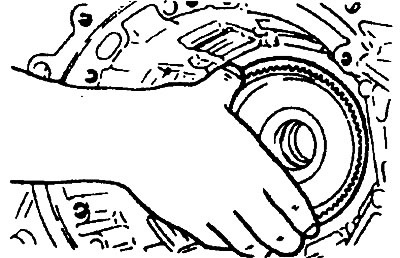
30. Remove the internal gear, output flange, intermediate gear and bearing from the housing as a single unit.
31. Remove the transmission shaft cover.
32. Unscrew the lock nut.
Note: The lock nut has left-hand threads.
33. Knock out the transmission shaft towards the torque converter housing.
34. Using a special tool (09432-33200), remove the bearing from the transmission shaft.
35. Using special tools (09432-33800, 09433-21000), remove the bearing from the drive gear of the transmission shaft.
36. Using a special tool (09517-21400), remove the outer ring of the transmission shaft bearing.
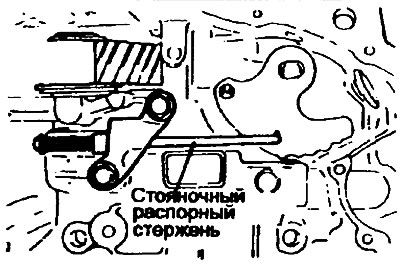
37. Unscrew the two bolts and remove the spacer rod.
38. Loosen the lock screw and remove the manual control shaft. Remove the steel ball, socket and spring.
 |
 |
Automatic transmission assembly
Warning: Do not reuse gaskets, seals and rubber parts, replace them with new ones. Do not use other greases. Apply automatic transmission fluid to all moving parts before installation.
Assembly is carried out in the reverse order of disassembly, using special tools and devices.
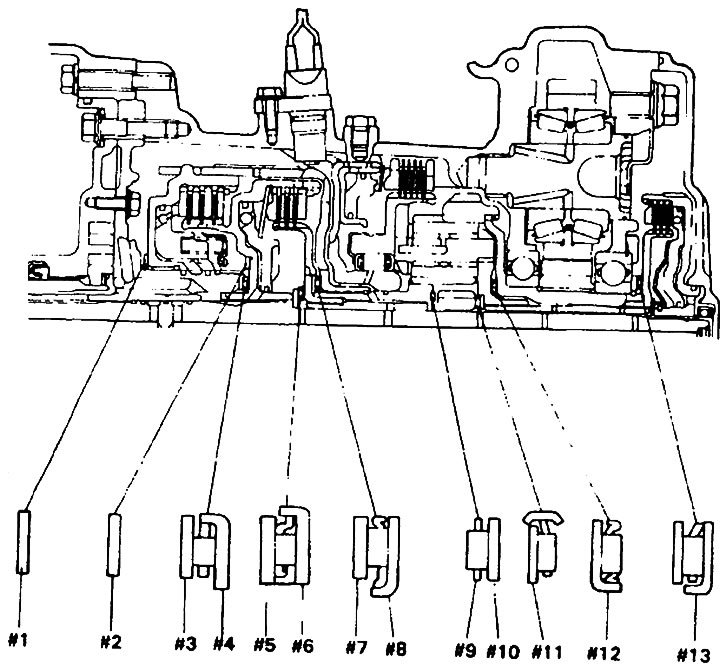
Dimensions of thrust bearings, rings and washers
Unit of measurement: mm
| Outer diameter | Int. diameter | Thickness | № |
| 70 | 55,7 | 1,4 | #1 |
| 70 | 55,7 | 1,8 | |
| 70 | 55,7 | 2,2 | |
| 70 | 55,7 | 2,6 | |
| 70 | 55,7 | 1,8 | #2 |
| 48,9 | 37 | 1,0 | #3 |
| 48,9 | 37 | 1,2 | |
| 48,9 | 37 | 1,4 | |
| 48,9 | 37 | 1,6 | |
| 48.9 | 37 | 1,8 | |
| 48,9 | 37 | 2,0 | |
| 48,9 | 37 | 2,2 | |
| 48,9 | 37 | 2,4 | |
| 48,1 | 34,4 | - | #4 |
| 40 | 21 | 2,4 | #5 |
| 42,6 | 28 | - | #6 |
| 54 | 38,7 | 1,6 | #7 |
| 52 | 36,4 | - | #8 |
| 41 | 28 | - | #9 |
| 39 | 28 | 1,2 | #10 |
| 38 | 22,2 | - | #11 |
| 52 | 36,4 | - | #12 |
| 58 | 44 | - | #13 |