HyundaiBook.ru
Repair Chevrolet Repair Honda Repair Toyota Repair Land Rover Repair VAZ Repair Renault Repair Nissan
English Русский
Български
Беларускі
Український
Српски
Hrvatski
Română
Polski
Slovenský
Magyar
ArticlesSitemapContacts  


  Accent   Elantra   Getz   Grandeur   Sonata   Santa Fe   Tucson   Others
Sonata 3 (1993-1998) Sonata 4 (2001-2012, petrol)
  • Main
  • Sonata
  • EF (2001-2012)
  • Chassis
  • Rear suspension
  • Rear Suspension Strut (2001 and later models)

Rear Suspension Strut (2001 and later models) (Hyundai Sonata EF)

0
Contents: Removal ⇓ Disassembly ⇓ Examination ⇓ Gas removal ⇓ Assembly ⇓ Installation ⇓
Rear suspension strut (models from…

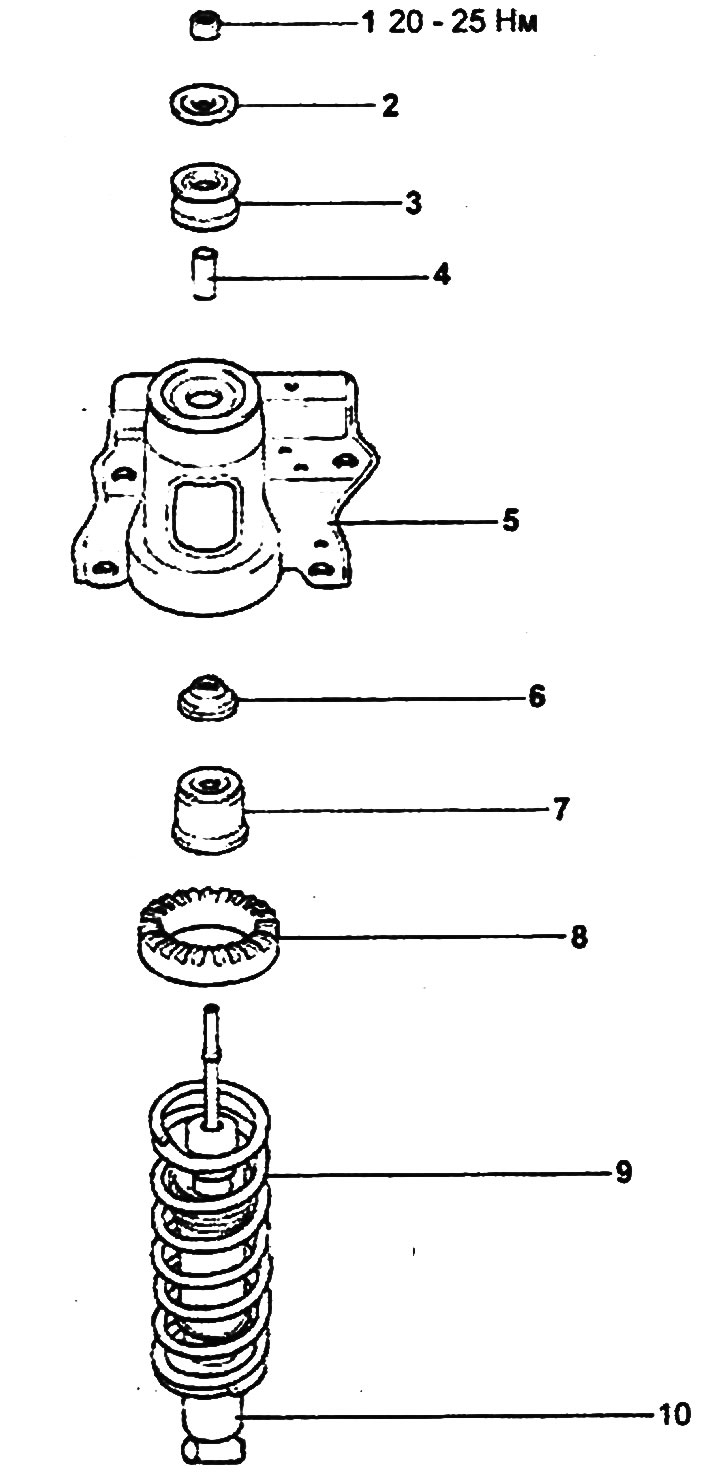
Rear suspension strut (models from 2001).

1 - self-locking nut, 2 - washer, 3 - upper bushing, 4 - bushing, 5 - strut bracket, 6 - lower bushing, 7 - cap, 8 - upper spring seat, 9 - spring, 10 - shock absorber.


Removal


1. Jack up the car, unscrew the bolts and remove the rear wheel.
  • Tightening torque: 90-110 Nm

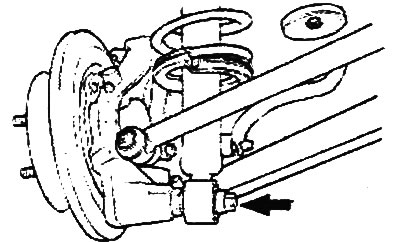
2. Unscrew the lower bolt securing the rack.
  • Tightening torque: 80-90 Nm

Tightening torque: 80-90 Nm


3. Loosen the bolt and disconnect the knuckle from the upper rear suspension arm.
  • Tightening torque: 100-120 Nm

Tightening torque: 100-120 Nm


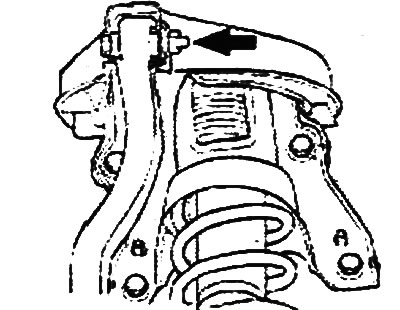
4. Loosen the bolt and disconnect the upper rear suspension arm from the strut bracket.


  • Tightening torque: 60-78 Nm

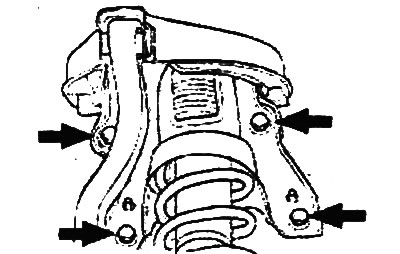
5. Loosen the bolts and remove the rack assembly with the bracket.
  • Tightening torque: 40-50 Nm

Tightening torque: 40-50 Nm


Disassembly


1. Using the special tool, compress the spring.

Caution: Do not use a pneumatic tool to tighten the nuts, this may cause damage to the special tool.


Caution: Do not use a pneumatic tool to…


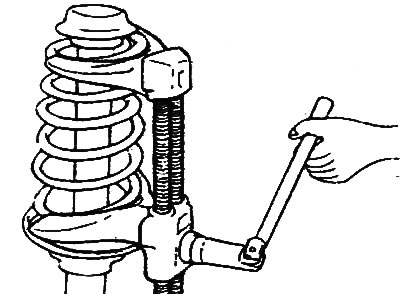
2. Unscrew the self-locking nut at the top of the rack.
  • Tightening torque: 20-25 Nm

Tightening torque: 20-25 Nm


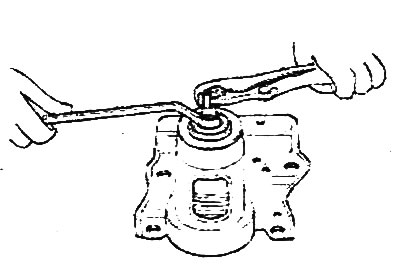
3. Remove the strut bracket, dust cover, and upper spring seat.


4. Remove the special tool and spring.

Examination


1. Check the rubber elements for damage and wear.

2. Check the spring for deformation, damage and wear.

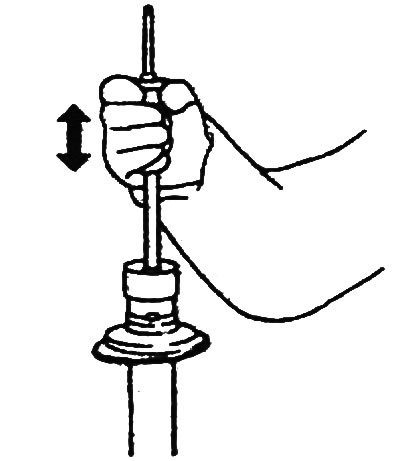
3. When pulling and pressing the shock absorber rod, check that its movement is smooth and there is no extraneous resistance or noise.

3. When pulling and pressing the shock…


If a fault is detected, replace the shock absorber.

Gas removal


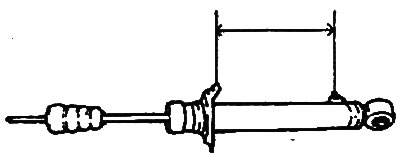
1. Pull the strut rod out fully.

2. Using a drill, drill a gas vent hole in the cylinder at the area shown in the figure.

Caution: The gas release is safe, but metal chips may fly out during drilling.


Caution: The gas release is safe, but…


Assembly


1. The front suspension strut is assembled in the reverse order of disassembly; the tightening torque of the nut is specified in the text of the description of the disassembly procedure and in the assembly drawing "Rear suspension strut (models since 2001)".


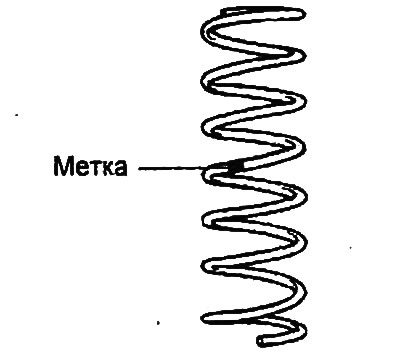
2. When assembling, make sure that the springs with the same color marks are used for the left and right struts.

2. When assembling, make sure that the…


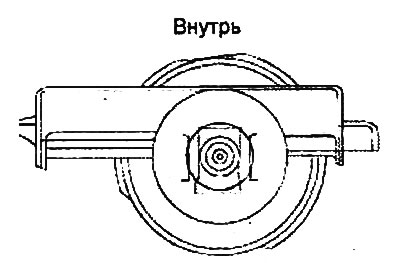
3. When assembling the rack, position the top support as shown in the figure.

3. When assembling the rack, position…


Installation


The installation of the rear suspension strut is carried out in the reverse order of removal; the tightening torques for the bolts and nuts are indicated in the text describing the removal procedure and in the assembly drawing "Rear suspension strut (models since 2001)".
This article is available at russian, bulgarian, belarusian, ukrainian, serbian, croatian, romanian, polish, slovak, hungarian
This article has been reviewed by: Konstantin Smirnov
Add to social network:

Previous
Sonata 4: Rear suspension
Next

Rear Suspension Strut (Pre-2001 Models)
Rear wheel knuckle and hub
Checking and adjusting the rear wheel alignment angles
Upper arm rear suspension
Rear suspension longitudinal rod
Rear suspension crossbar
Lower arm rear suspension
We recommend other articles on the topic of Hyundai manuals:

Rear suspension strut Hyundai Accent 2 (1999-2005)
Rear suspension strut Hyundai Elantra 3 (2000-2006)
Rear suspension strut Hyundai Getz (2002-2011)
Rear suspension trailing arm Hyundai Santa Fe 2 (2007-2012, petrol)
Rear suspension — device Hyundai Tucson 1 (2005-2010)
Removal and checking the rear suspension trailing arm Hyundai Matrix (2001-2010, petrol)

Link in different formats to this article

Visitor comments
No comments yet


How much will 13 + 24 ?


Sonata 4 (2001-2012, petrol) 
  • General information
  • User manual
  • Maintenance
  • Power unit
  • 2.0 and 2.4 liter engines
  • 2.7 liter engines
  • Engine overhaul
  • Cooling system
  • Intake and exhaust systems
  • Lubrication system
  • MFI fuel injection system
  • Engine electrical equipment
  • Transmission
  • Clutch
  • Mechanical gearbox
  • Automatic gearbox
  • Drive shafts
  • Chassis
  • Front suspension
  • Rear suspension
  • Steering
  • Brake system
  • Body
  • Exterior
  • Interior
  • Heater and air conditioner
  • Security systems
  • Electrical equipment
  • Troubleshooting
  • Electrical circuits
Sonata 3 (1993-1998) 
  • General information
  • Maintenance
  • Power unit
  • Engine repair I4 DOHC
  • Engine repair I4 SOHC
  • Engine repair V6 SOHC
  • Cooling system
  • Intake and exhaust system
  • Exhaust gas treatment
  • Fuel system
  • Transmission
  • Clutch
  • Mechanical gearbox
  • Automatic transmission KM-175
  • Automatic transmission F4A33
  • Chassis
  • Front suspension
  • Rear suspension
  • Steering
  • Brake system
  • Body
  • Body elements
  • Electrical equipment
  • Equipment and devices
HyundaiBook.ru © 2018-2026 · Mobile version · Sitemap: EN BG BY UA RS HR RO PL SK HU · Administration · Site search · Hyundai owners Accent 1 · Accent 2 · Accent 3 · Elantra 1 · Elantra 2 · Elantra 3 · Getz · Sonata 3 · Sonata 4 · Santa Fe 2 · Tucson 1 · Tucson 2 · Matrix ·
This site uses cookies to optimize its functionality. By continuing, you agree to our terms.