
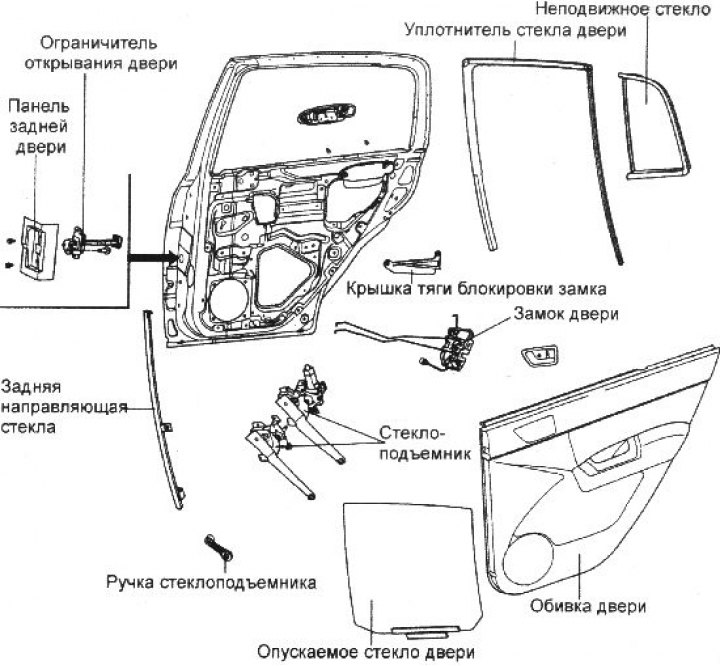
Door trim
1. Loosen the screws securing the inner door handle.
2. Remove the four screws securing the door trim. Insert the door trim puller between the door trim and the door and release the clips.
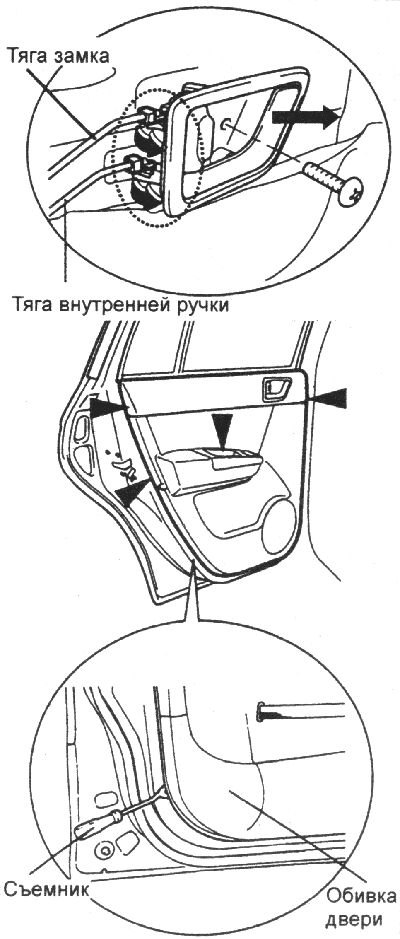
Note: When removing the trim, wrap the puller in a cloth to avoid damaging the door paint.
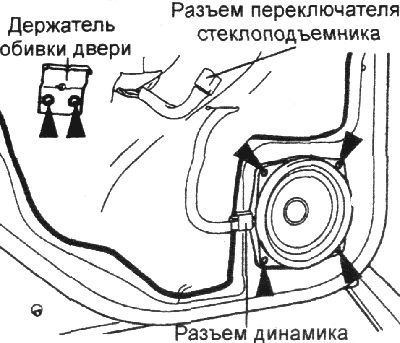
3. Remove the door trim holder and moisture-proof film, unscrew the 4 screws, disconnect the connector and remove the speaker from the door.
4. Installation is carried out in the reverse order of removal.
Roll-down glass and window lifter
1. Remove the door trim, trim holder, moisture-proof film and speaker.
2. Gently press the window switch and lower the window to the desired position.
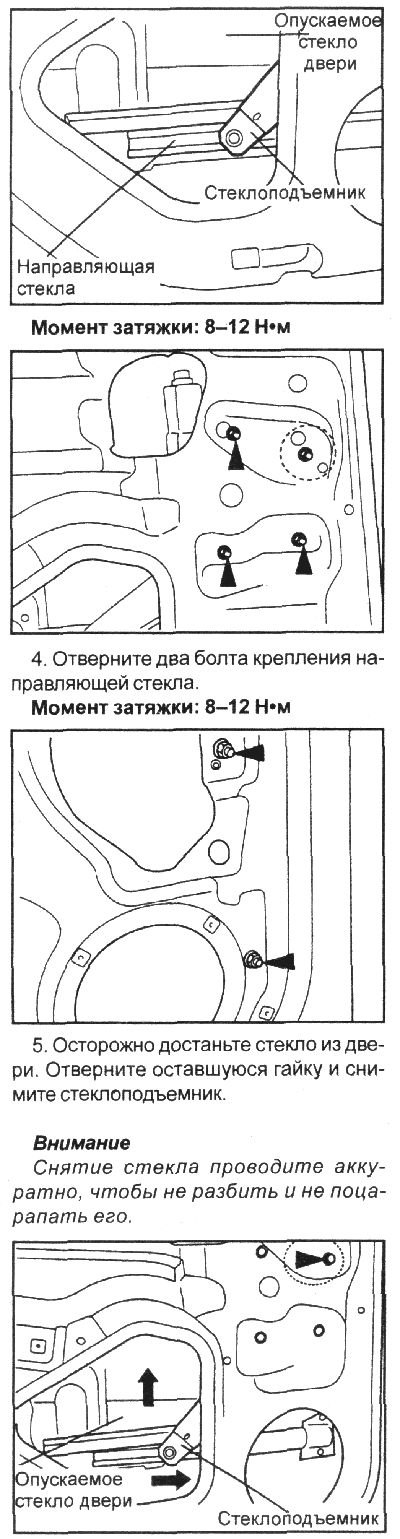
3. Unscrew the 3 window regulator mounting nuts, loosen another nut and disconnect the glass holder from the window regulator.
6. Remove the glass seal.
7. Remove the screw and remove the top gutter.

2. Remove the glass and window regulator.
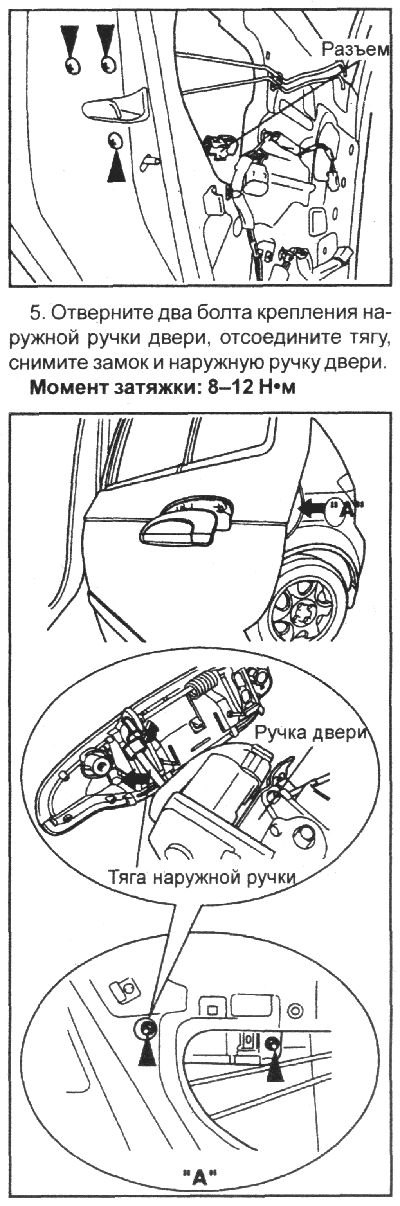
3. Unscrew the two screws securing the traction cover with the lock locks and use a puller to remove the cover.
4. Disconnect the connector from the window lift motor and remove the three screws securing the door lock.
Tightening torque: 8–11 Nm
6. Installation is carried out in the reverse order of removal.
Adjusting the door position
Check that the door closes easily and properly, then check that the gaps between the front and back, top and bottom of the door and the body are uniform. The doors and the edges of the body should be parallel.
1. Slightly loosen the door hinge bolts and adjust the position of the door by moving it up and down or left and right.
2. If the door lock is installed on the strike plate with difficulty, unscrew the strike plate mounting screws and, by moving it in horizontal and vertical planes, achieve normal door closing.
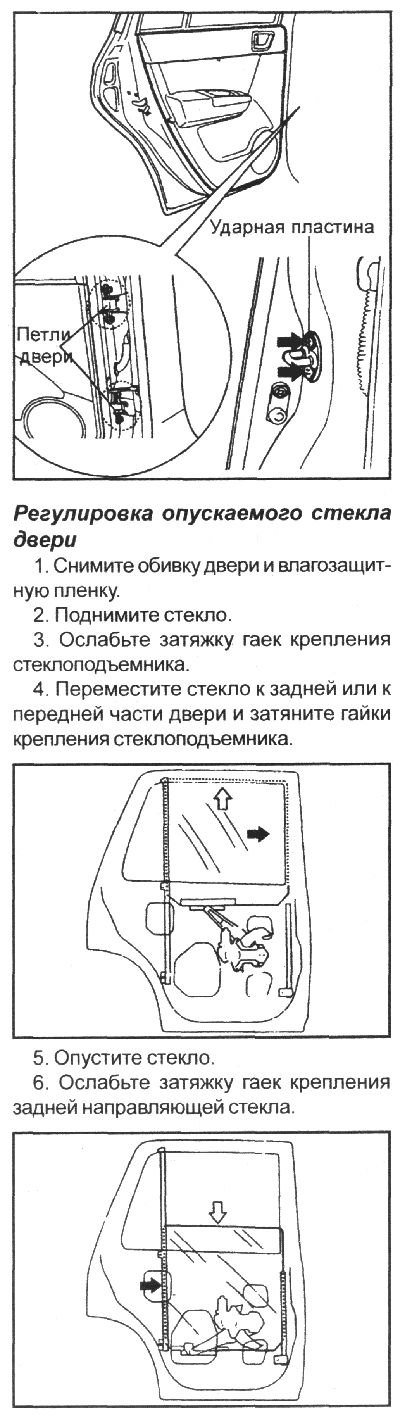
7. Slide the rear glass guide until it stops against the glass edge and tighten the nuts.
8. Check the smooth movement of the glass.