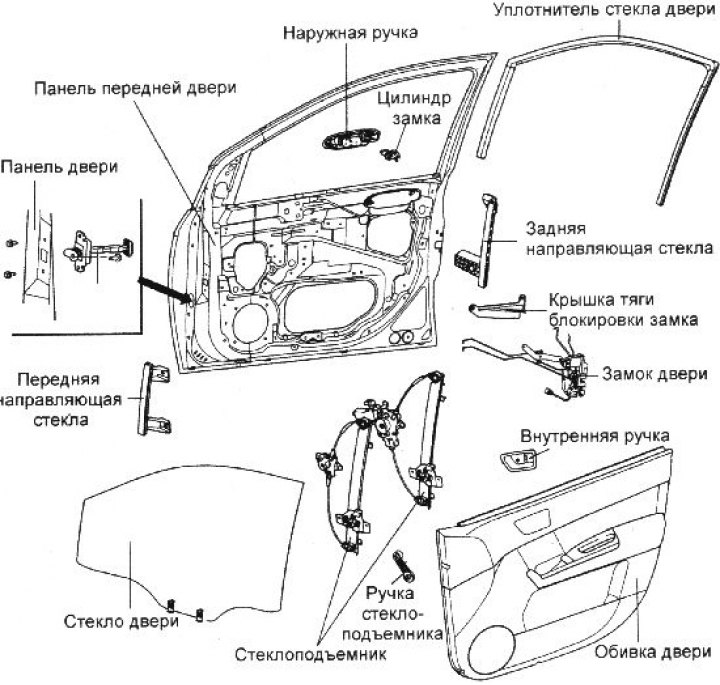
Door trim
1. Loosen the screws securing the inner door handle.
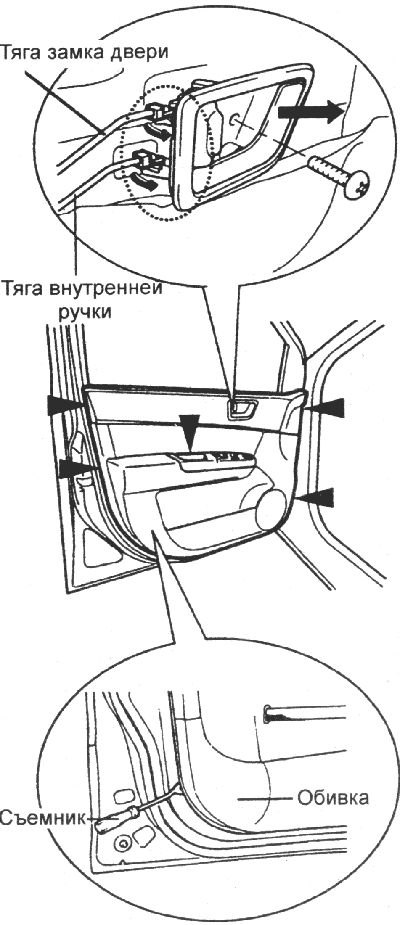
2. Remove the five screws securing the door trim. Insert a door trim puller between the door trim and the door and release the clips. Disconnect the electrical connector from the power window switch.
Note: When removing the trim, wrap the puller in a cloth to avoid damaging the door paint.
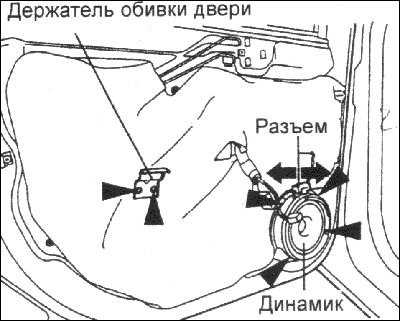
3. Loosen the two screws securing the door trim holder and remove the moisture-proof film. Loosen the 4 screws, disconnect the connector and remove the speaker from the door.
4. Installation is carried out in the reverse order of removal. When installing the moisture-proof film, the holes for the door trim fasteners should not be covered.
[The original can be found on the resource: HYUNDAIBOOK.ru]
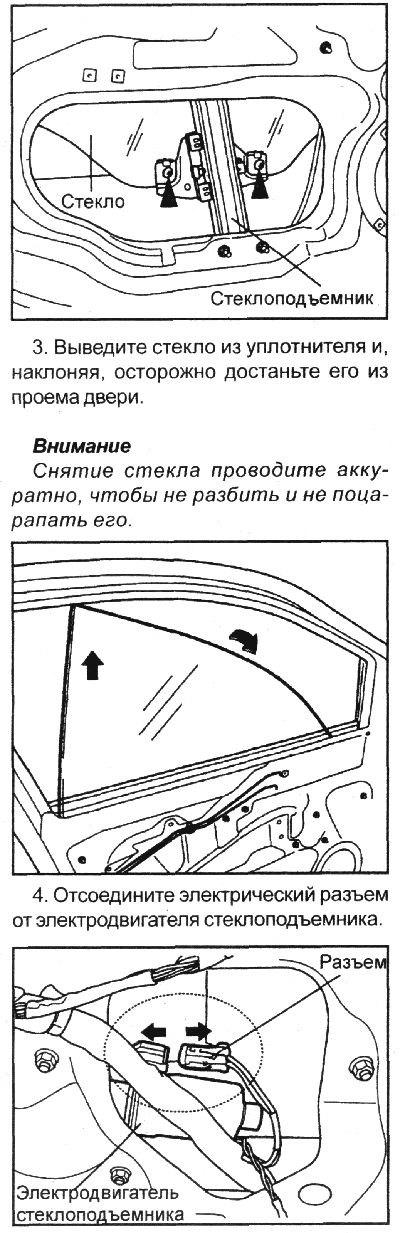
Glass and window lifter
1. Remove the door trim, trim holder, moisture-proof film and speaker.
2. Carefully press the window switch and lower the window until the two window mounting bolts are accessible through the opening in the inner door panel. Remove the window mounting bolts.
Tightening torque: 8–12 Nm
5. Unscrew the four window regulator mounting nuts and the three window regulator motor mounting nuts and remove the window regulator assembly through the opening in the inner door panel.
Tightening torque: 4–6 Nm
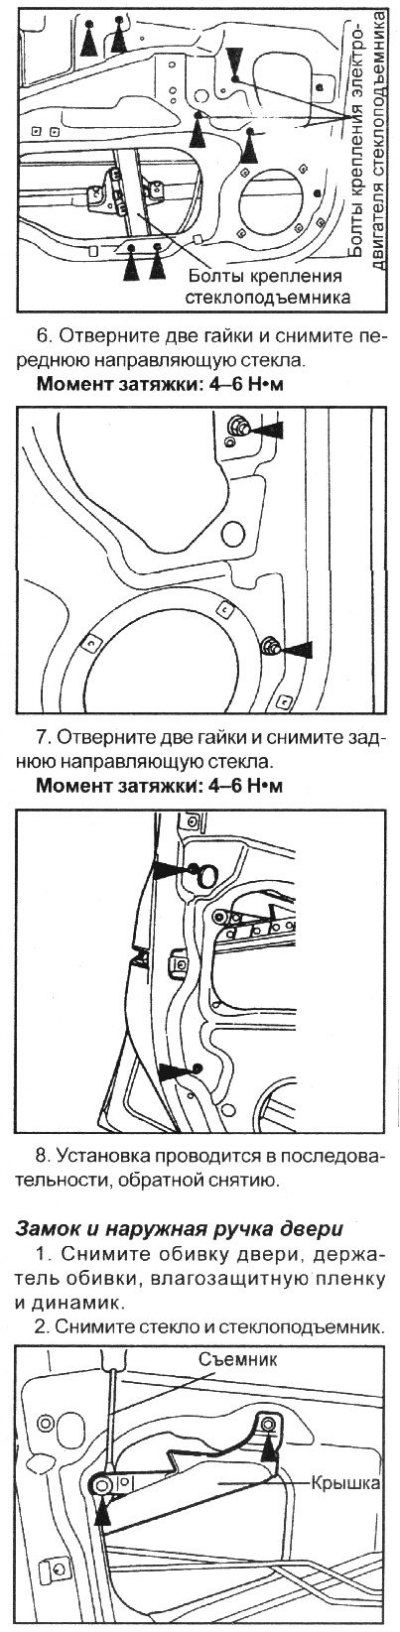
6. Installation is carried out in the reverse order of removal.
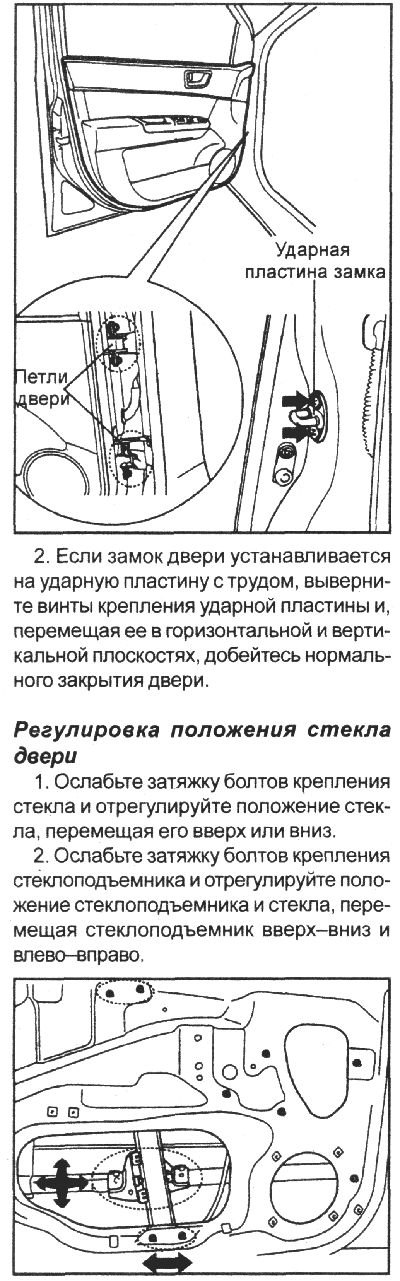
Adjusting the door position
Check that the door closes easily and properly, then check that the gaps between the front and back, top and bottom of the door and the body are uniform. The doors and the edges of the body should be parallel.
1. Slightly loosen the door hinge bolts and adjust the position of the door by moving it up and down or left and right.