
Contents: Checking the Throttle Position…⇓ Checking the automatic transmission…⇓ Checking the vehicle speed sensor…⇓ Checking the automatic transmission…⇓ Checking the electromagnetic valves ⇓
Checking the Throttle Position Sensor (TPS)
The throttle position sensor is a potentiometer with a sliding contact that moves in accordance with the rotation of the throttle axis, indicating the opening angle of the valve. When the throttle axis rotates, the signal voltage of the throttle position sensor changes. Based on the change in the value of the sensor signal voltage and the rate of its change, the electronic engine control unit determines the degree and speed of opening of the throttle valve.
Checking the automatic transmission oil temperature sensor
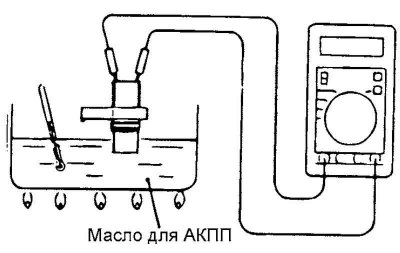
Fig. 3.52. Automatic transmission oil temperature sensor test diagram
Remove the automatic transmission oil temperature sensor.
Measure the resistance between terminals 1 and 2 of the sensor connector at the test points.
Checking the vehicle speed sensor (vehicle speed sensor)
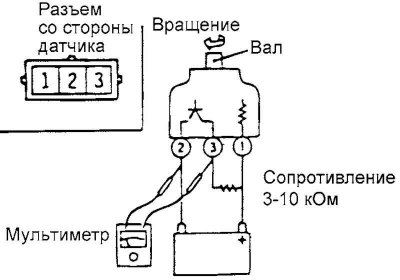
Fig. 3.53. Vehicle speed sensor test diagram
Remove the vehicle speed sensor and connect a 3-10 kOhm resistor to it, as shown in Figure 3.53.
Rotate the vehicle speed sensor shaft to ensure that voltage appears at terminals 2–3 of the sensor connector (4 pulses per revolution).
Checking the automatic transmission control relay (a/t control relay)
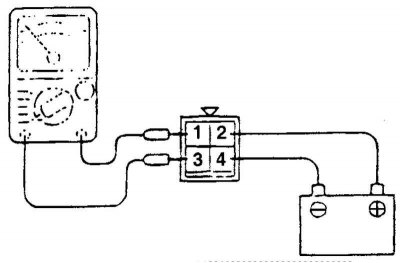
Fig. 3.54. Automatic transmission control relay test diagram
Remove the automatic transmission control relay.
Using wires with a crocodile clip connector (jumper wires) connect terminal 2 of the automatic transmission control relay to the positive (+) terminal of the battery, and terminal 4 to the negative (–) terminal.
Check the condition of the circuit between terminals 1 and 3 of the control relay with the wires connected and disconnected from the battery terminals.
If the relay operation differs from that specified, replace the automatic transmission control relay.
Checking the electromagnetic valves
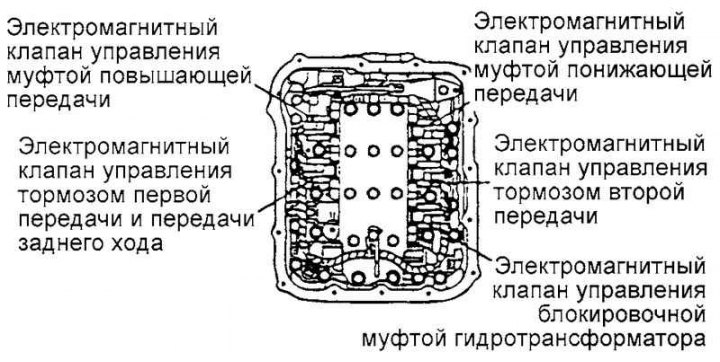
Fig. 3.55. Electromagnetic valve testing diagram
Remove the control valve housing cover.
Disconnect the connectors from each solenoid valve.

Fig. 3.56. Measuring the resistance between terminals 1 and 2 of each solenoid valve
Measure the resistance between terminals 1 and 2 of each solenoid valve (Fig. 3.56).
If the resistance is outside the standard value, replace the solenoid valve.
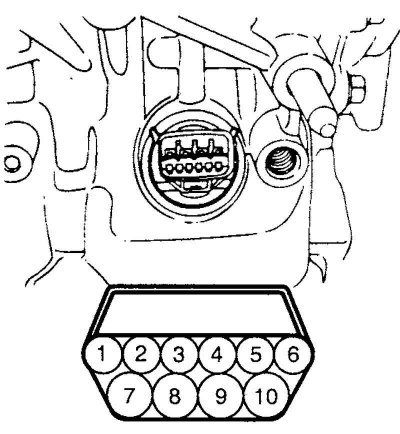
Fig. 3.57. Control valve block connector terminals
Note: Resistance at the terminals of the control valve block connector (Fig. 3.57).