Contents: Removal and installation headlights…⇓ Removal and installation front fog…⇓ Replacing the side turn signal bulb ⇓ Replacing the rear combination light…⇓ Replacing the additional brake light…⇓ Replacing the license plate light…⇓ Replacing the local lighting lamp ⇓ Replacing the interior light bulb ⇓ Replacing the luggage compartment…⇓
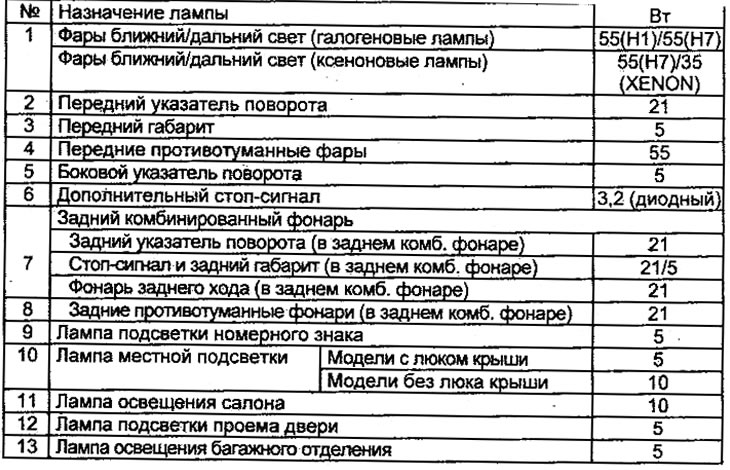
Before replacing a bulb, make sure the ignition and all lights are off. Use only bulbs with the rated power specified in the table.
Attention:
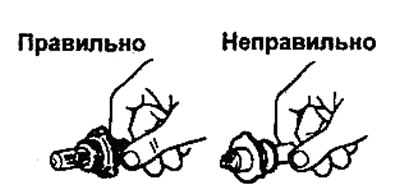
- New halogen bulbs require special handling due to the increased pressure inside. They may rupture or break if scratched or dropped.
- Hold the lamp only by its plastic or metal body. Do not touch the glass part of the lamp with bare hands, dirty gloves, etc. If the glass surface of the lamp is dirty, it must be cleaned with alcohol, dried thoroughly, and only then installed.
- Installing a lamp with a power higher than the rated power will damage the diffuser.
Removal and installation headlights and turn signals
1. Disconnect the cable from the negative terminal of the battery.
2. Unscrew the two bolts securing the headlight turn signal, disconnect the connectors and remove them as an assembly.
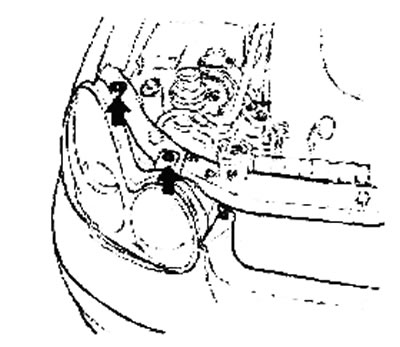
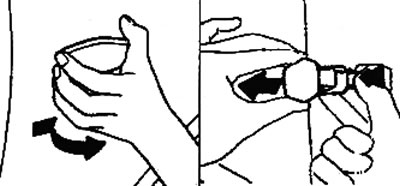
3. Remove the lamp holder cover by turning it counterclockwise.
4. Disconnect the inner connector, then release the bulb retaining spring and remove the bulb from the headlight.
5. Disconnect the front turn signal connector, remove the bulb holder by turning it counterclockwise, then remove the bulb from the holder.
6. Installation is carried out in the reverse order of removal.
Removal and installation front fog lights
1. Disconnect the cable from the negative terminal of the battery.
2. Remove the turn signal and headlight assembly.
3. Remove the front bumper, unscrew the four bolts securing the front fog light, disconnect the connector and remove it.
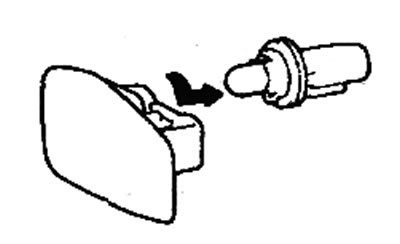
4. Remove the bulb from the socket by turning it counterclockwise while simultaneously pushing it into the socket.
5. Installation is carried out in the reverse order of removal.
Replacing the side turn signal bulb
1. Disconnect the cable from the negative terminal of the battery.
2. Press the side turn signal lamp forward and then remove the side turn signal lamp assembly. Disconnect the lamp connector.
3. Remove the lamp holder assembly by turning it counterclockwise, then remove the lamp from the holder.
4. Installation is carried out in the reverse order of removal.
Replacing the rear combination light bulb
1. Disconnect the cable from the negative terminal of the battery.
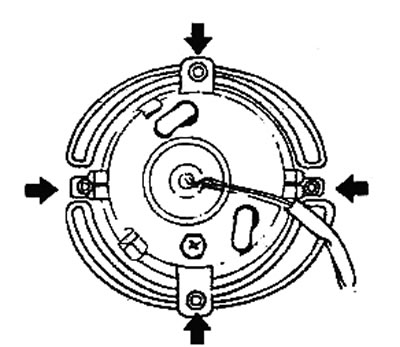
2. Unscrew the four nuts securing the rear combination light.
3. Disconnect the connector and remove the rear combination light assembly.
4. Remove the bulb from the socket by turning it counterclockwise while simultaneously pushing it into the socket.
5. Installation is carried out in the reverse order of removal.
Replacing the additional brake light bulb
1. Disconnect the cable from the negative terminal of the battery.
2. Unscrew the two nuts securing the additional brake light.
3. Disconnect the connector and remove the additional brake light.
4. Remove the lamp from the socket.
5. Installation is carried out in the reverse order of removal.
Replacing the license plate light bulb
1. Disconnect the cable from the negative terminal of the battery.
2. Loosen the screws, disconnect the connectors and remove the license plate light lamps.
3. Remove the lamp from the socket by pulling it towards you.
4. Installation is carried out in the reverse order of removal.
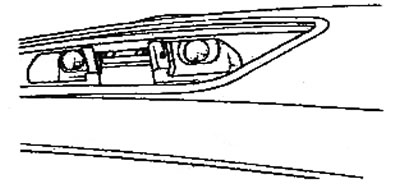
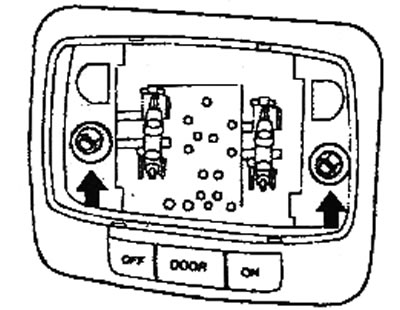
Replacing the local lighting lamp
1. Disconnect the cable from the negative terminal of the battery.
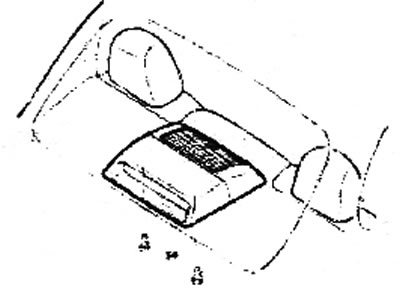
2. Remove the two bolts and remove the roof center console from the headliner.
3. Using a flat-head screwdriver, remove the diffuser for the local lighting lamp located on the overhead console.
Note: To avoid scratching the diffuser, wrap the end of the screwdriver in a piece of cloth.
4. Remove the lamp from the socket by pulling it towards you.
5. Installation is carried out in the reverse order of removal.
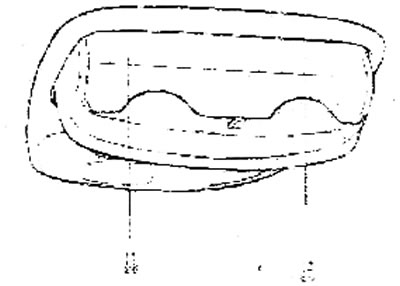
Replacing the interior light bulb
1. Disconnect the cable from the negative terminal of the battery.
2. Using a flat-head screwdriver, remove the diffuser.
Note: To avoid scratching the diffuser, wrap the end of the screwdriver in a piece of cloth.
3. Unscrew the two bolts and remove the interior light.
[The original source of the article is the website HYUNDAIBOOK]
4. Remove the lamp from the socket by pulling it towards you.
5. Installation is carried out in the reverse order of removal.
Replacing the luggage compartment light bulb
1. Disconnect the cable from the negative terminal of the battery.
2. Using a flat-head screwdriver, remove the diffuser.
Note: To avoid scratching the diffuser, wrap the end of the screwdriver in a piece of cloth.
3. Remove the luggage compartment light.
4. Installation is carried out in the reverse order of removal.
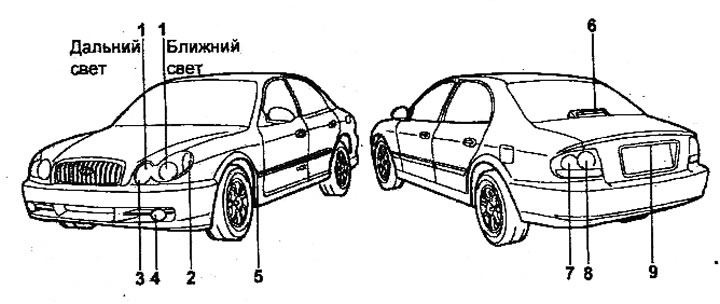
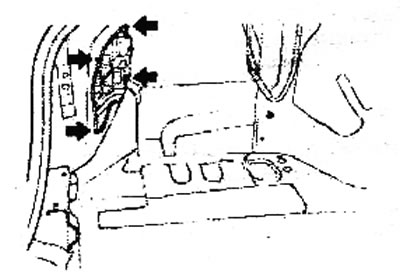
Location of external lighting fixtures.
Table of lamp power (given according to European standards).