
Contents: Headlamps, direction indicators and…⇓ Rear combination light ⇓ Rear fog lamp (optional) ⇓ License plate light ⇓ Luggage compartment light ⇓ Side turn signal lamp ⇓ Interior lighting lamps ⇓ Glove compartment light ⇓
Before replacing lamps, make sure the switch is in the "OFF" position.
Attention! Do not allow petroleum products (oil, gasoline, etc.) to come into contact with the lamp.
Attention! After driving the car in the rain or after washing the headlights, the rear lights may fog up. This happens due to high humidity, as well as the difference in temperature of the headlights, rear lights and the surrounding air. The formation of condensation on the glass outside does not mean that there is a malfunction of the external lighting devices, this is a normal phenomenon.
Headlamps, direction indicators and front parking lights
Let the lamp cool down. Put on protective glasses.
Open the hood.
Hold the lamp by the plastic base, do not touch the glass bulb with your hands.
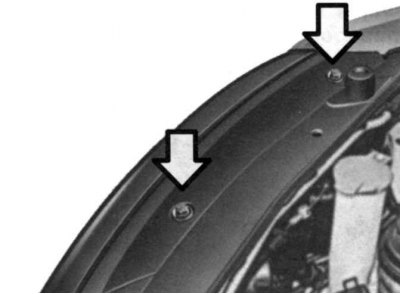
Fig. 1.234. Removing the protective cover
Unscrew the protective cover (Fig. 1.234).
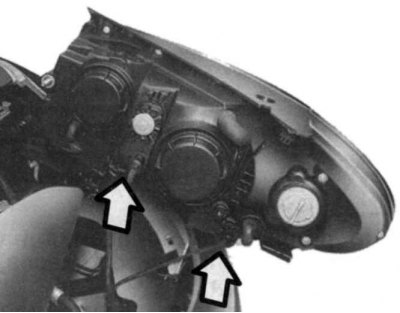
Fig. 1.235. Disconnecting the power cord
Disconnect the power wire from the back of the plastic base on the rear of the headlight (Fig. 1.235).
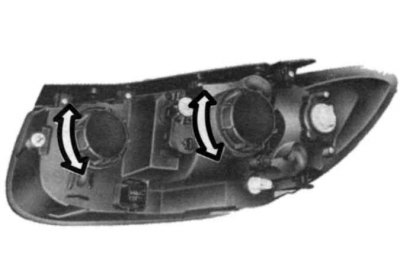
Fig. 1.236. Removing the protective cap
Turn the protective cap counterclockwise and remove it (Fig. 1.236).
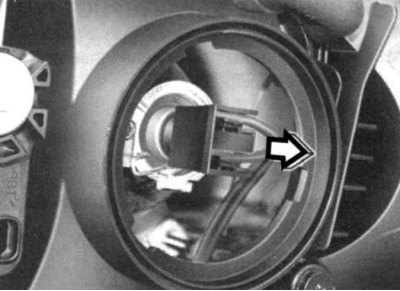
Fig. 1.237. Disconnecting the connector
Disconnect the connector on the lamp base (Fig. 1.237).
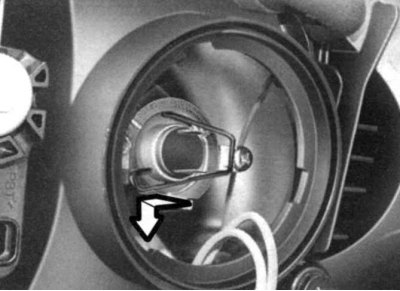
Fig. 1.238. Removing the lamp
Press on the lamp spring to remove it (Fig. 1.238).
Remove the protective cap from the bulb to be replaced and install the new bulb by aligning the plastic base of the bulb with the hole in the headlight. Fasten the bulb spring, install the protective cover and connect the power cable.
When disposing of an old lamp, use the protective cap and cardboard packaging.
Check that the headlight beam is adjusted correctly.
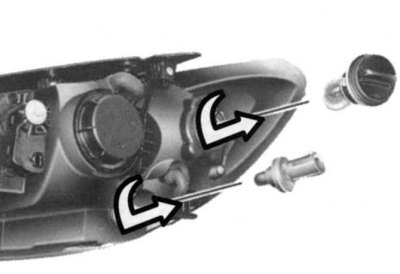
Fig. 1.239. Installing a new lamp
To replace the front turn signal and parking light bulbs, remove the bulb with the socket assembly and install a new bulb (Fig. 1.239).
Rear combination light
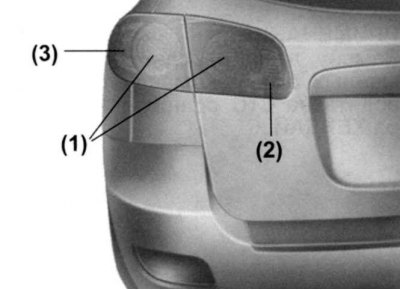
Fig. 1.240. Rear combination light: 1 – brake light and rear side light bulb; 2 – reversing light bulb; 3 – rear turn signal lamp
Open the back door.
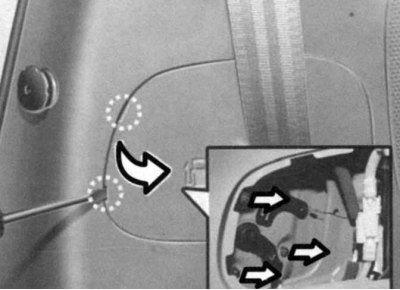
Fig. 1.241. Opening the hatch on the side panel
Information is copied from the website www.hyundaibook.ru
Using a flat-head screwdriver, open the hatch on the side panel of the luggage compartment or on the rear door (Fig. 1.241).
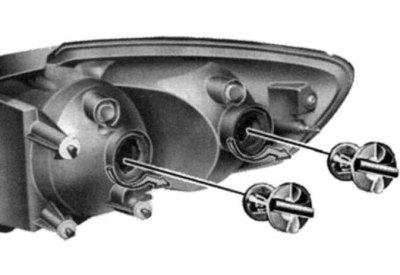
Fig. 1.242. Rear combination light mounting screws
Loosen the screws securing the rear combination light (Fig. 1.242).
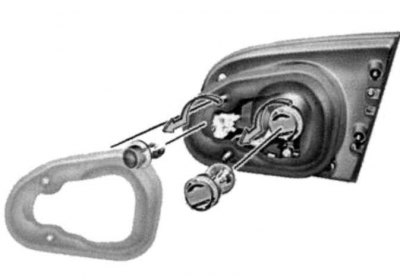
Fig. 1.243. Removing the lamp holder
Remove the rear combination light and remove the socket and bulb assembly from the light housing by turning it counterclockwise (Fig. 1.243).
Install a new lamp.
Rear fog lamp (optional)
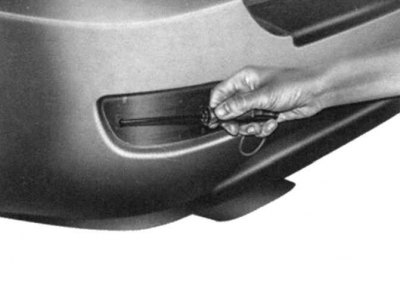
Fig. 1.244. Unscrewing the fastening screws
Using a Phillips screwdriver, unscrew the rear fog light mounting screws and remove it (Fig. 1.244).
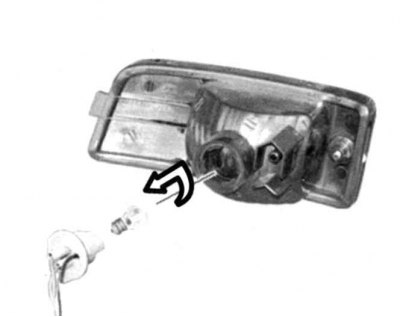
Fig. 1.245. Removing the socket with the lamp from the flashlight unit
Remove the socket with the lamp from the flashlight unit by turning it counterclockwise (Fig. 1.245).
Replace the burnt-out lamp with a new one.
License plate light
Using a Phillips screwdriver, remove the license plate light lens mounting screws.
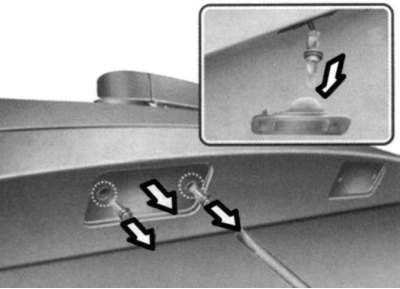
Fig. 1.246. Removing the lamp holder
Disconnect the wire from the socket by turning the socket counterclockwise, then remove the lamp from the socket by turning it clockwise (Fig. 1.246).
Install a new lamp.
Luggage compartment light
Open the back door.
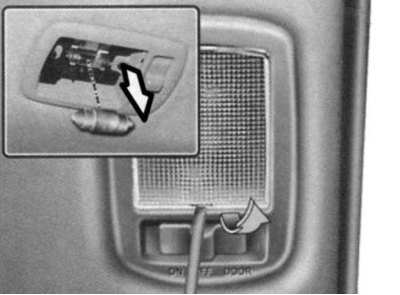
Fig. 1.247. Removing the lampshade
Use a screwdriver to open the lampshade (Fig. 1.247).
Replace the lamp.
Side turn signal lamp
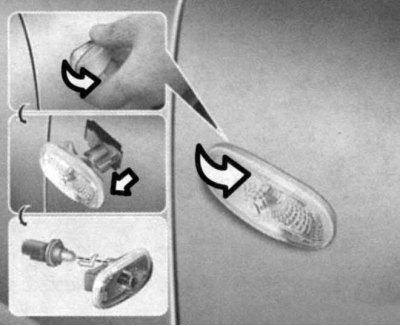
Fig. 1.248. Removing the side turn signal lamp
Press the side turn signal, move it forward and remove it from the vehicle body (Fig. 1.248).
Disconnect the connector.
Replace the lamp.
Interior lighting lamps
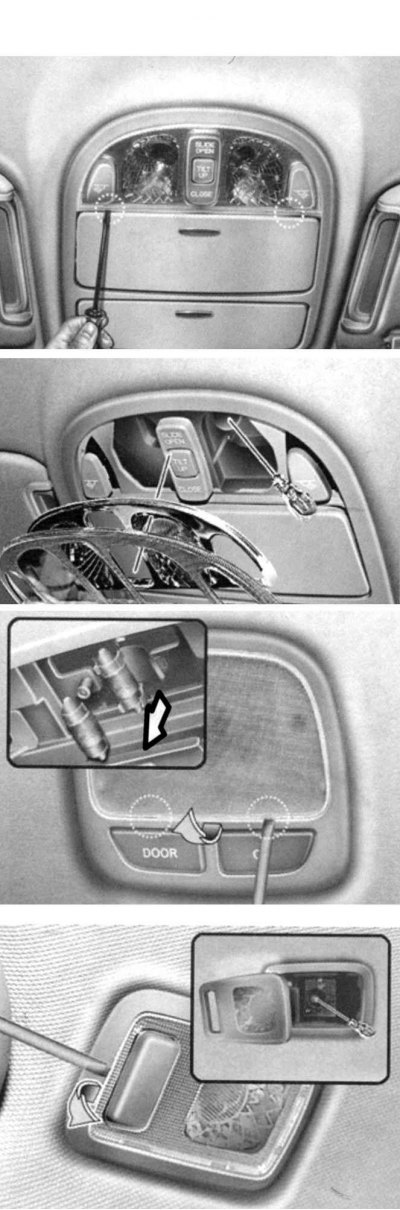
Fig. 1.249. Replacing interior lighting lamps
Remove the interior light diffuser using a screwdriver (Fig. 1.249).
Replace the lamp.
Glove compartment light
Open the glove compartment.
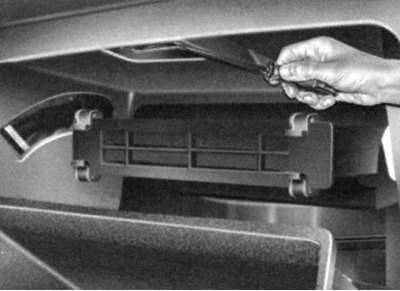
Rice. 1.250. Removing the lampshade
Remove the lampshade using a screwdriver (Fig. 1.250).
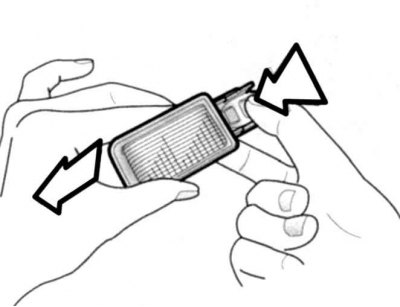
Fig. 1.251. Disconnecting the connector
Disconnect the connector (Fig. 1.251).
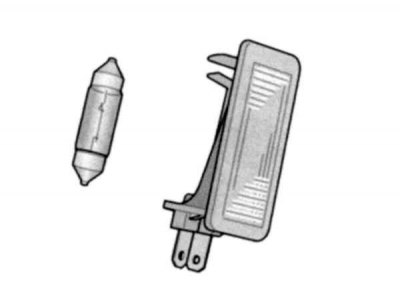
Fig. 1.252. Replacing the lamp
Replace the lamp (Fig. 1.252).