
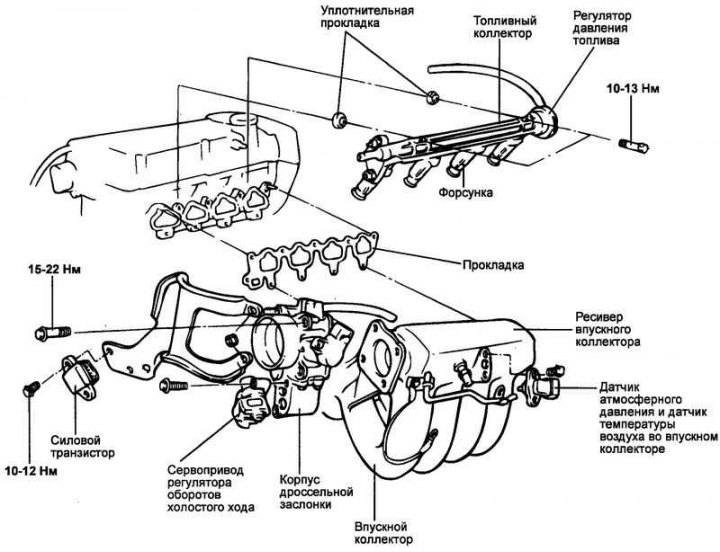
Fig. 2.176. Intake manifold components
Removal
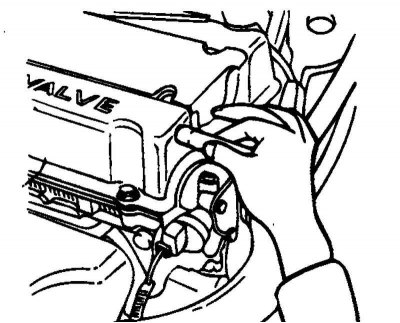
Fig. 2.177. Disconnecting the crankcase ventilation hose
Disconnect the crankcase ventilation hose from the throttle body (Fig. 2.177).
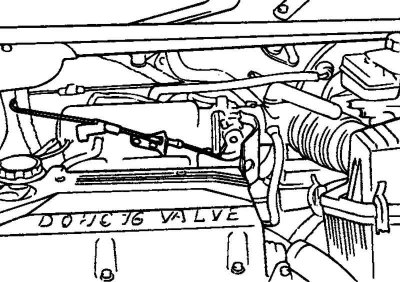
Fig. 2.178. Accelerator pedal cable
Disconnect the accelerator pedal cable (Fig. 2.178).
Disconnect the coolant hose from the throttle body.
Disconnect the positive crankcase ventilation valve hose and the brake booster vacuum hose.
Remove the vacuum hose fitting.
Fig. 2.179. Removing the injector cover
Remove the injector cover (Fig. 2.179).
Before disconnecting the high pressure fuel hose from the fuel rail, relieve any residual pressure in the system.
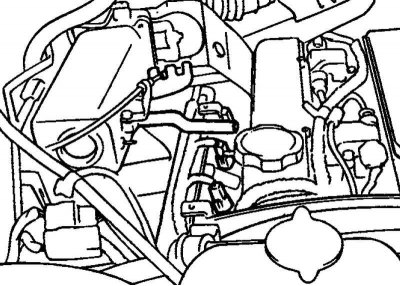
Fig. 2.180. Fuel injector wiring harness connector
Disconnect the fuel injector wiring harness connector (Fig. 2.180).
Remove the fuel manifold together with the injectors.
Caution: Be careful not to drop the injectors when removing the fuel rail.
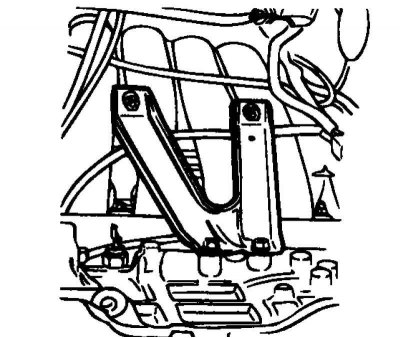
Fig. 2.181. Fastening the intake manifold stand
Unscrew the intake manifold support mount (Fig. 2.181).
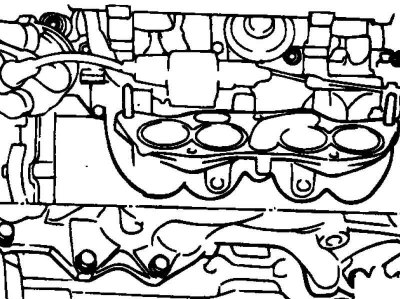
Fig. 2.182. Intake manifold assembly
Remove the intake manifold assembly and gasket (Fig. 2.182).
Examination
Check the parts for cracks and damage.
Check the condition of the air passages, water jacket and vacuum hose fittings. Clean if necessary
Using a straightedge and a feeler gauge, measure the warpage of the intake manifold mating surface.
Nominal value: 0.15 mm.
Maximum permissible value: 0.20 mm.
Installation
Replace the intake manifold gasket with a new one and install the intake manifold in place.
Intake manifold mounting tightening torque:
- bolts - 15-20 Nm;
- nuts - 30-42 Nm.

Fig. 2.183. Fuel manifold assembly with injectors
Install the fuel manifold together with the injectors (Fig. 2.183).
Attention! Make sure that the injector seals are installed correctly.
Connect the fuel injector harness connector. Install the injector cover.
Install the intake manifold stand.
Tightening torque for intake manifold strut mounting: 18–25 Nm.
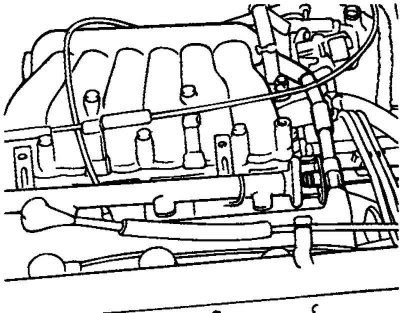
Fig. 2.184. Connecting the high-pressure fuel hose
Connect the high pressure fuel hose (Fig. 2.184).
Connect the positive crankcase ventilation hose and the brake booster vacuum hose.
Connect the air hose to the throttle body.
Connect the accelerator pedal cable.
Connect the idle speed control servo connector and the throttle position sensor connector.