
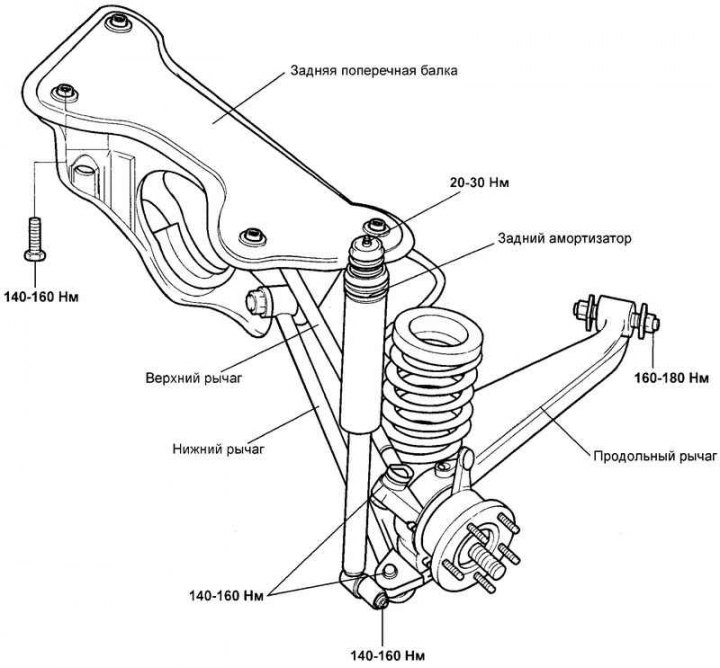
Fig. 4.36. Rear pillar
Removal
Remove the wheel.
Remove the flange nut and brake caliper assembly.
Disconnect the parking brake mechanism.
Disconnect the wheel speed sensor wire and the parking brake cable.
Remove the rear shock absorber assembly.
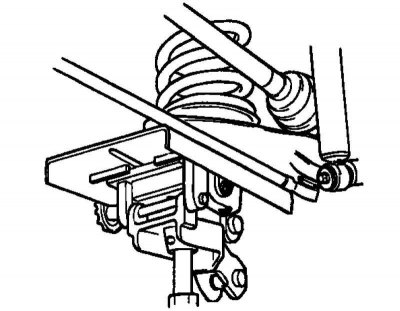
Fig. 4.37. Installing a jack under the longitudinal arm
Note: When removing the rear shock absorber, remove the rear shock absorber mounting bolt. Support the trailing arm with a jack (Fig. 4.37).
If the rear shock absorber is removed, the spring can be removed easily.
Remove the rear wheel drive shaft from the rear axle assembly.
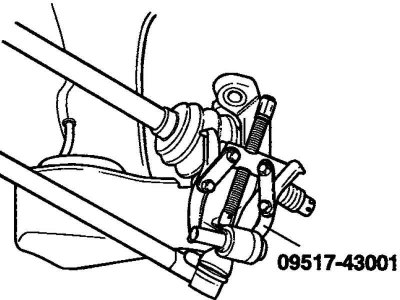
Fig. 4.38. Removing the upper and lower rear suspension arms
Using a special tool, remove the upper and lower rear suspension arms (Fig. 4.38).
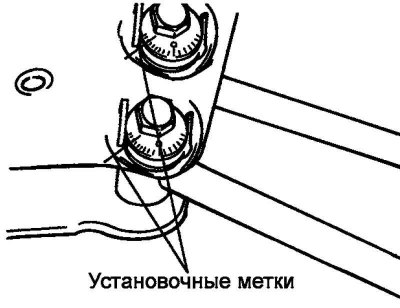
Fig. 4.39. Marking locations on the rear cross beam and cams
Note: Apply alignment marks to the rear crossmember and cams (Fig. 4.39).
Remove the trailing arm completely.
Remove the driveshaft.
Note: The driveshaft removal procedure is described on page DS-9.
Loosen the muffler fasteners for easier access.
Remove the rear crossmember. Ensure clearance between the fuel tank and the differential housing.
Installation
Installation is carried out in the reverse order of removal.
Align the upper and lower end coils of the spring with the corresponding notches on the upper and lower cups of the strut.
After installation, add brake fluid and bleed the system.
Perform wheel adjustment.
Examination
Check the bushing for wear and deformation.
Check the lower and upper rear suspension arms for bends or damage.
Check the ball joint protective boot for cracks.
Check all bolts.
Check the initial torque of the ball joints of the upper and lower arms.
If there are cracks in the protective boot, replace the ball joint assembly.
Rock the ball joint pin several times to check for looseness.
Check the ball joint pin rotation torque.
Nominal torque: 1.0–3.5 Nm.
Note: If the pin torque exceeds the rated torque, replace the ball joint assembly.
Note: If the pin torque is less than the rated torque, the ball joint can be used further if there is no damage.