
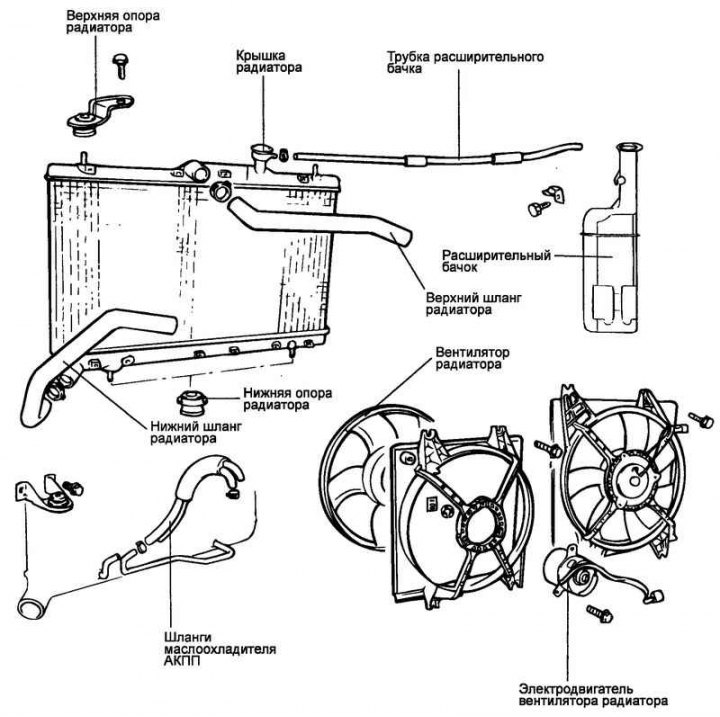
Fig. 2.177. Components of the cooling system radiator
Removal
Disconnect the radiator fan motor connector.
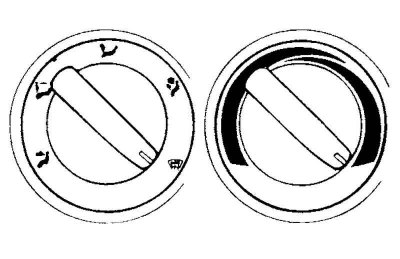
Fig. 2.178. Temperature controller switch
Set the temperature control switch to the maximum heating position (Fig. 2.178).
Remove the radiator drain plug and drain the coolant.
Disconnect the upper and lower radiator hoses and the expansion tank tube.
On models with automatic transmission, disconnect the automatic transmission oil cooler hoses.
Attention! After disconnecting the automatic transmission oil cooler hoses, it is necessary to plug the holes in the hoses, the radiator fittings and the automatic transmission pipes to prevent automatic transmission oil from leaking out and foreign particles from getting inside.
Loosen the radiator support mounting bolts.
Remove the radiator together with the radiator electric fan.
Remove the electric fan from the radiator.
Examination
Check the radiator for bent or damaged fins and for foreign objects between the fins.
Check the radiator for damage and any scale, rust or corrosion deposits.
Check the radiator hoses for cracks, damage or deterioration (wear).
Check the expansion tank for damage.
Check the radiator cap spring for damage.
Check the opening pressure of the radiator cap valves using a special tester for checking the cooling system.
Radiator Fan Motor
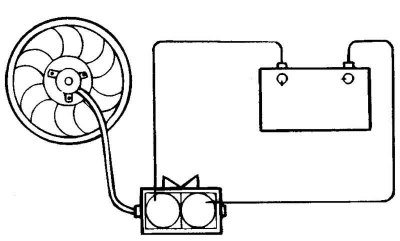
Fig. 2.179. Checking the radiator electric fan
Check that the radiator electric fan rotates when battery voltage is applied to the electric motor terminals (Fig. 2.179).
Check for any extraneous noise when the radiator electric fan rotates.
Installation
Fill the radiator and expansion tank with clean coolant.
Start the engine and warm it up until the thermostat valve opens. Then turn off the engine.
Remove the radiator cap and add fluid to the base of the radiator filler neck, then add fluid to the expansion tank to the upper mark.
Check for any fluid leaks from the radiator, hoses or connections.