
Contents: Seat belts with mechanical…⇓ Seat belts with pyrotechnic…⇓ Front seat belt ⇓ Rear seat belts ⇓ Seat belt for the middle rear seat ⇓
Seat belts with mechanical pretensioners
1. After the pretensioner has been activated, replace the seat belt with a new one.
2. When removing the seat belt, do not hold the belt webbing, as this may cause the belt pretensioner to operate.
3. Do not disassemble or repair the seat belt pretensioner module.
4. When installing the seat belt, after first screwing in the belt fastening bolt, wind more than 500 mm of belt onto the inertia reel. After installing the belt, it can be pulled out and wound off the reel.
5. After installing the belt and unwinding it from the reel to a length of more than 2000 mm, even a slight jerk of the belt may cause the seat belt pretensioner to operate.
6. The installation height of the seat belt pretensioner must not exceed 400 mm.
7. Do not hold more than one seat belt pretensioner in your hands.
Seat belts with pyrotechnic pretensioners
1. The seat belt pretensioner module operates only once.
2. When removing the seat belt, do not hold the belt strap, as this may cause the pretensioner to accidentally operate and injure your hands.
3. Do not disassemble or repair the seat belt pretensioner module.
4. Connect the cable to the negative battery terminal only after the seat belt pretensioner module is correctly installed.
5. Removing the pretensioner:
- make sure the ignition is off;
- disconnect the negative battery cable;
- wait at least 1 minute;
- disconnect the electrical connector from the seat belt pretensioner inflator, remove the bolt and remove the seat belt pretensioner.
6. Installation is carried out in the reverse order of removal.
Note: To avoid damaging interior elements while working, wrap the tools you use in a clean cloth.
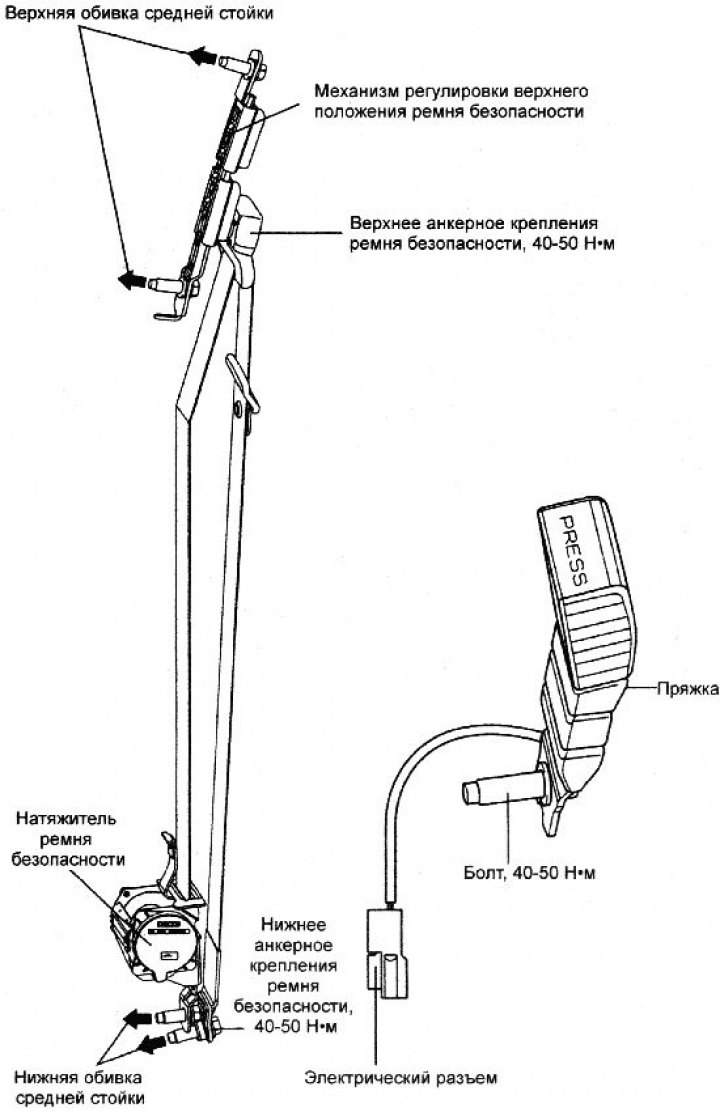
Front seat belt
1. Before removing the seat belt, first remove the following items:
- front door sill trim;
- rear door sill trim;
- lower trim of the middle pillar of the body;
- upper trim of the middle pillar of the body.
2. Remove the front seat belt.
3. Installation is carried out in the reverse order of removal.
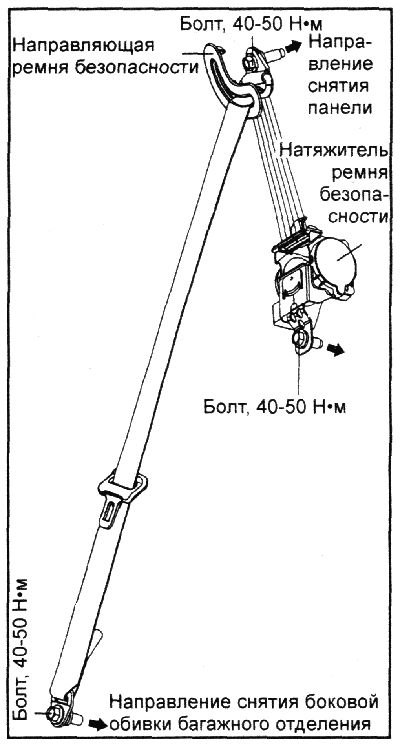
Rear seat belts
Note: To avoid damaging interior elements while working, wrap the tools you use in a clean cloth.
1. Before removing the seat belt, first remove the following items:
- rear luggage compartment trim;
- side trim of the luggage compartment;
- upholstery of the rear body pillar.
2. Remove the rear side seat belt.
3. Installation is carried out in the reverse order of removal.
Seat belt for the middle rear seat
Note: To avoid damaging interior elements while working, wrap the tools you use in a clean cloth.
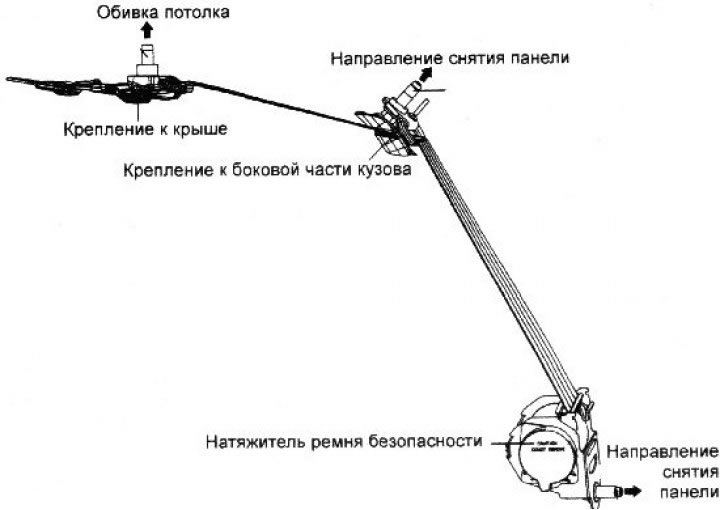
1. Before removing the seat belt, first remove the following items:
- rear luggage compartment trim;
- side trim of the luggage compartment;
- upholstery of the rear body pillar.
2. Remove the center rear seat belt.
3. Installation is carried out in the reverse order of removal.