
Contents: Removal and installation the…⇓ Removal and installation the lower…⇓ Removal and installation the glove…⇓ Removal and installation the center…⇓ Removal and installation the radio ⇓ Removal and installation the…⇓
Removal and installation the instrument cluster
Attention!
- To prevent damage to parts, wrap the screwdriver blade in a cloth.
- To avoid injuring your hands, wear gloves.
1. Set the steering column to the lower position.
2. Loosen the screw and use a screwdriver to remove the instrument cluster visor.
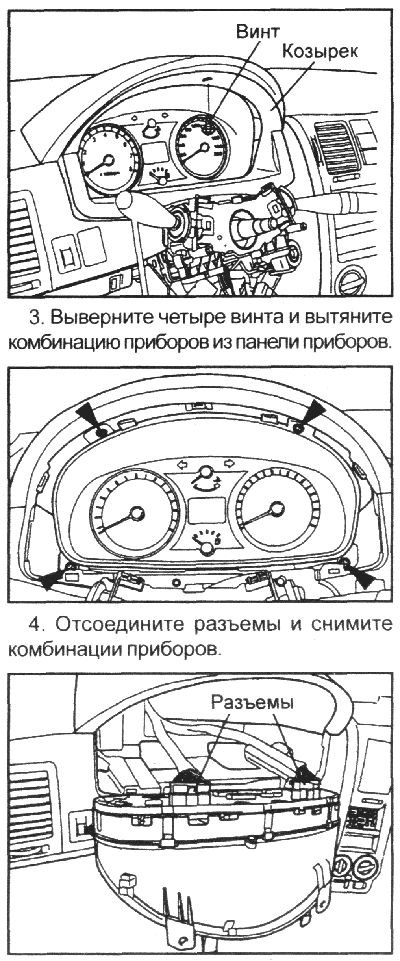
5. Installation is carried out in the reverse order of removal.
Removal and installation the lower instrument panel trim
Attention!
- To prevent damage to parts, wrap the screwdriver blade in a cloth.
- To avoid injuring your hands, wear gloves.
Note: Be careful not to scratch the instrument panel.
1. Set the steering column to the upper position.
2. Remove the door sill trim and the lower front pillar trim.
3. Remove the cover from the fuse box.

5. Installation is carried out in the reverse order of removal.
Removal and installation the glove box
Note: Be careful not to scratch the instrument panel.
1. Remove the glove box holders.
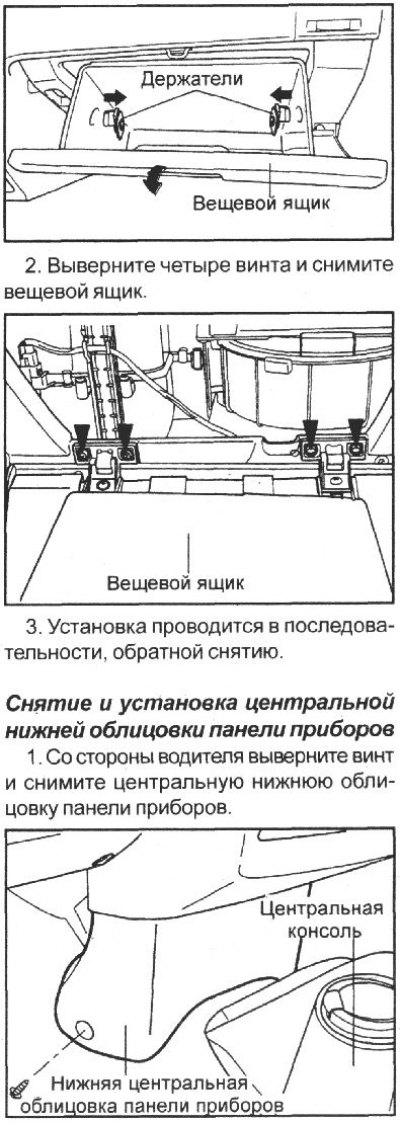
2. Installation is carried out in the reverse order of removal.
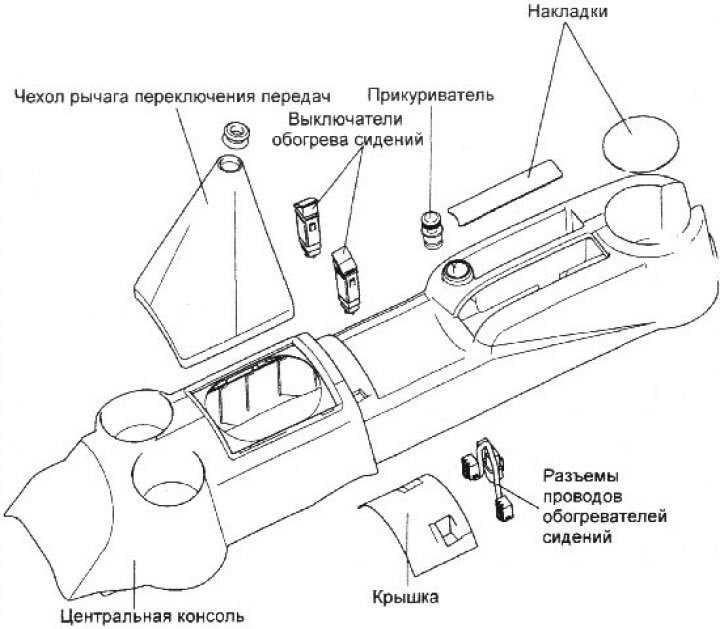
Removal and installation the center panel
1. Remove the glove box.
2. Remove the lower instrument panel trim.
3. Disconnect the air intake, air distribution and air mixing flap drive cables of the interior ventilation system. Using a puller, starting from the bottom, remove the central panel.
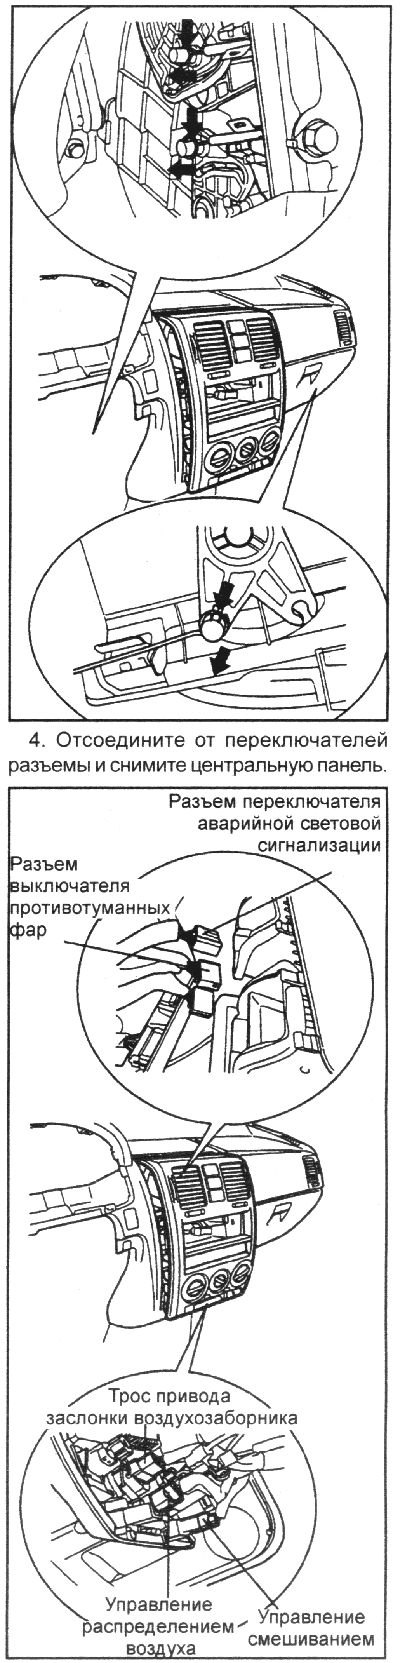
5. Installation is carried out in the reverse order of removal.
Removal and installation the radio
1. Remove the glove box.
2. Remove the lower instrument panel trim.
3. Remove the center panel.
4. Unscrew the four screws securing the radio receiver.
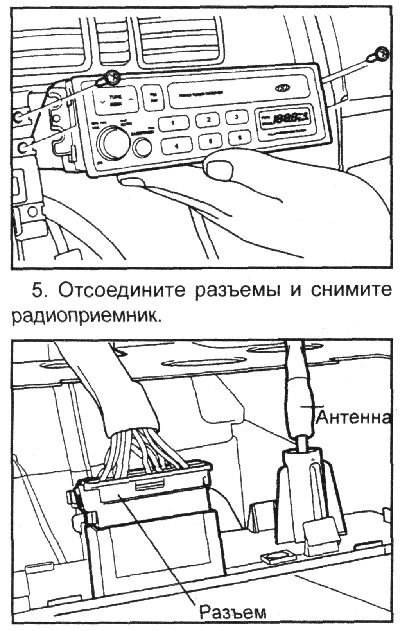
6. Installation is carried out in the reverse order of removal.
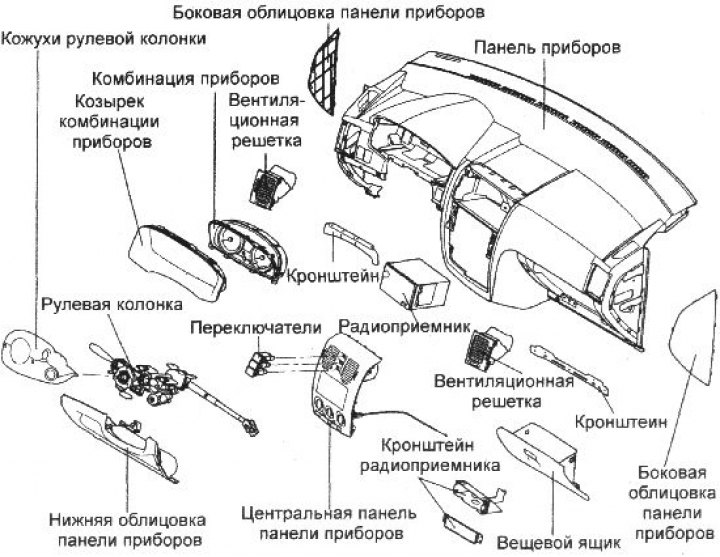
Removal and installation the instrument panel
Attention!
- To prevent damage to parts, wrap the screwdriver blade in a cloth.
- To avoid injuring your hands, wear gloves.
Note: Be careful not to scratch the instrument panel.
1. Remove the steering wheel with the airbag.
2. Remove the center lower instrument panel trim.
3. Remove the glove box.
4. Remove the lower instrument panel trim.
5. Remove the center panel.
6. Remove the radio.
7. Remove the side trims of the instrument panel.
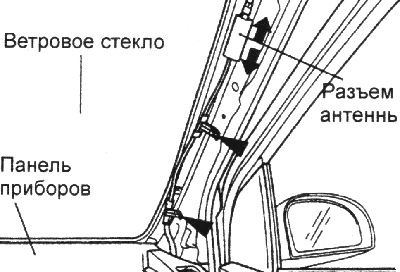
8. Disconnect the antenna connector.
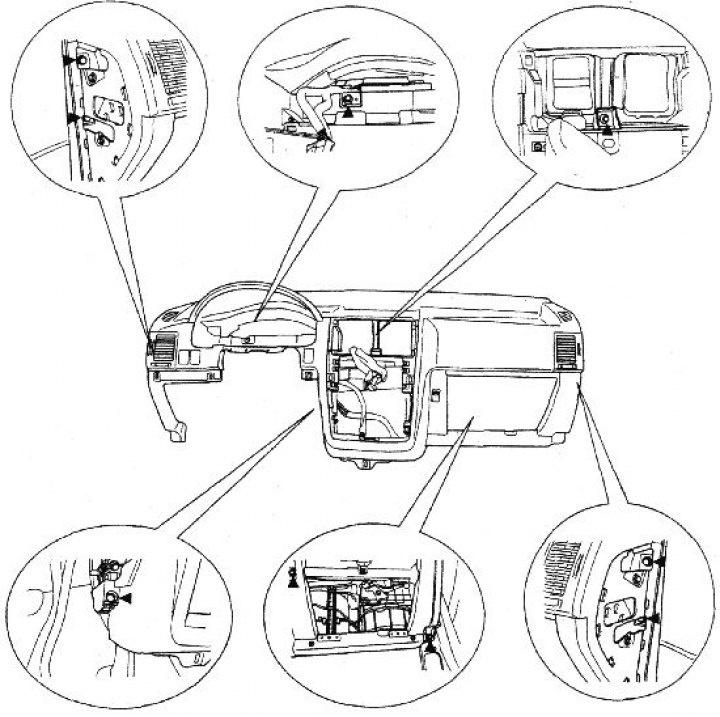
9. Remove nine bolts and remove the instrument panel.
10. Installation is carried out in the reverse order of removal.